
This summer hasn’t been the best. I’ve been laid up due to one thing and another so I haven’t shot as much as I usually do. After having a good rental experience in May I planned to rent a macro lens or two and explore the world of in-camera focus stacking and post focus shooting. That didn’t happen, but I did manage to get into the woods recently to specifically play with this feature.
This post isn’t going to be a how-to article. There are lots of those already out there so hit up Google if you’re looking for a step-by-step walk through. Instead I’m going to talk about my initial experience, quirks, things to watch out for, and if I think I’ll use it in future. So let’s go.
I should have read more thoroughly ahead of time. All I had with me was a cheat-sheet outlining the steps to use 6K capture, but it didn’t give me all the info I needed. With the very first shot something was amiss. Underexposed. Way underexposed. I had the camera in Manual and … wait a minute. Why can’t I set a shutter speed lower than 1/30?

Frantically I search through menus looking for minimum shutter speed. Maybe I accidentally turned it on (I use it for my handheld custom setting). Nope. Does it still limit me in other modes like Aperture priority and Program? Yup. If I take it out of 6K capture is it still in effect? Nope.
So…as it turns out (RTFM!) 1/30 of a second is the slowest shutter speed available in this mode. I was baffled by this restriction at first, but after I thought about it a while it made sense. It’s how video works. Slower shutter speeds would create blur in video files and since that’s what a 6K or 4K capture is, those rules apply.

Anyway. I could cope, but I didn’t like it. I often shoot in the shade and low light of the forest floor. This high shutter speed means I have to either open the lens up or choose a higher ISO. I think I will lean toward opening up the lens since I’ll be doing a stack and it should create bokeh in places I can select to preserve. More tinkering!
So that’s my head’s up for using this shooting mode. In subsequent sessions I used an aperture priority mode and exposure compensation combined with Auto ISO to set exposure.
Moving on. I should have taken some notes on which kind of shot is which since it’s impossible to tell which used Range merge or Auto merge and I used both. Basically it breaks down like this. When you hit the shutter the camera takes a short video (1 second in my case) using all the focus points it can identify (you cannot set the focus point). After a wait for processing (a few seconds) you are presented with some choices on what to do with the file.
You can –
- Choose an individual focus point in the shot by touching that spot on the screen. This is called post focus. When you do and hit save, it creates a jpeg file from a still frame in the video that has the focus point you selected. You can do this over and over again with different focus points. As you select them the slice of the 6K video shows you the image with your choice so you can compare. Touching the Peak icon will show you with focus peaking which areas are sharp. Nice.
- Choose to merge or stack individual photos to create one image with many focus points to have greater depth of field. You can either have the camera use all the shots (Auto Merge) or choose specific areas (Range Merge). The display shows green squares to indicate which areas of the picture will be stacked/merged and you simply touch to turn them on or off (a dark green border means it’s on – important to choose this or it won’t select a photo with this area in focus). You can also go back and start over again.
It takes a few seconds for the camera to save either kind of file so watch your battery status. So many reviews say that battery life for the G9 is great, but I don’t agree. The thing eats batteries. If you’re using 6K or 4K mode you’re going to use a lot of juice. Be prepared and don’t run out of power while it’s trying to create these files!
When you’re done you’ll have the camera-created jpeg shots and the original 1-second video clips. A word on jpeg – You do not have to be in RAW+jpeg, it will kick out a high-resolution file automatically. If you have the right software, you can use the video files to create stacked images or pull stills with specific focus points, but I don’t plan to do this. One of the reasons I bought my G9 was so that the camera would do it for me. I’m lazy that way.
So how does it compare to RAW?
For the most part, quite well. Any “failings” in the following photos I think are due to changing light conditions.


I used Luminar Flex for processing and tried to get them as close as possible using the same values for sharpness, detail and only changing things for exposure and white balance. At first glance they are very close, but there are differences. These next few shots are approximately 100% cropped sections. First the mushroom tips –


Neither is great, but I think the 6K file suffers from problems with noise (low reduction levels the same for both) and with halo effects produced by changes in light and/or movement of the mushroom bodies themselves (wind). Look at the difference in the leaves behind! Wow. There is a little chromatic aberration apparent in the RAW file that doesn’t show in the 6K file. In practice I could have chosen just the back of the shot in a focus range and left the mushroom alone. I’ll have to give that a try. Here are some shots of the base of the mushroom –


Better in terms of halo issues since there wasn’t much change here at the ground. It still looks a bit noisy to me and somewhat crispy as well. There is more smoothness in the RAW file. After looking at these and underexposed images, I think underexposing will be the way to go. Edges look more natural to me and I like the way the light seems less scattered. Another experiment to try!
And now some shots just to the left of the mushroom cluster –


A little halo effect around the mushroom bodies in the upper right corner, but I like the focus and detail in the leaves. Here’s another example of problems created by movement, this time wind –

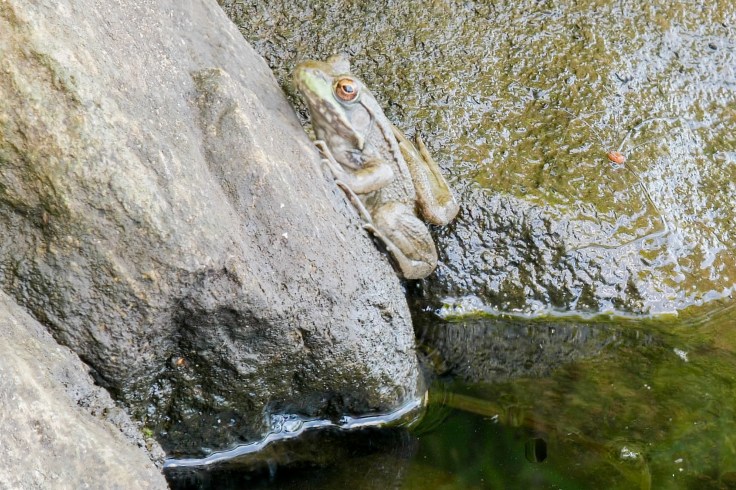
Here are a couple more examples and one that has taught me to not rely completely on this method. Since you can’t direct the focus point with 6K, the camera can miss what you really want in the picture. The frog is the subject, but the camera missed it one time and got it another (neither is sharpened in post) –

Normally I don’t pick apart my photos this way, but I am new to this 6K stuff so need to evaluate it critically.
Final thoughts –
So that’s my first experience using 6K capture with the G9. I’ll keep it in the toolbox, but will be more aware of potential movement or light changes in the scene before using it and I’ll always take a traditional RAW image along side. Not just for ‘backup’, but because of the fundamental differences in the resulting picture. If I decide to shoot macro in a studio set up, this will probably be ideal, but outdoor work has more variables that I’ll have to watch.


Leave a comment