
We’ve all heard it. Shoot in RAW, it’s better. Shoot in RAW, you have more processing options. Shoot in RAW, or else you’re just an amateur. Shoot in RAW, it contains more information. Shoot. In. RAW.
Well, yes and no.
I decided to write this post for a couple of reasons. First, that I recently saw an exchange on a photography board about using a particular Camera Style produced by the Lumix G9, a style probably designed for video, but which I quite like for stills. The first reply was that the person should do this in post processing and shoot in RAW.
Ugh! It is a RAW file, but one with a more obvious look than some others.
Here’s the thing. All RAW files are processed. In the camera, before they get to your computer. All of them.
The thing is to understand how much processing and whether or not you’re cancelling it out with your RAW editor. Oh and before we go any further, RAW isn’t an acronym so I have no idea why we use all caps like that, but it’s the usual way we see the word so I’ll continue the practice here even though it bugs me.
The other reason I wanted to write this is because I’ve been experimenting with a Linear Profile created by Tony Kuyper of TK Action Panels fame. Between that and the more prominent position Adobe has given to Profiles in general, I’ve come to understand just how many times your so-called RAW file gets stepped on before you even touch a slider. For a more detailed explanation of Profiles and especially a Linear Profile, visit Tony’s website.
If you’re a Lightroom user you will find the Profiles section at the top of the Basic panel just under the histogram. Adobe Camera Raw places it in a similar location. The Profile being used is shown first – mine is Camera Scenery because I changed my import settings to preserve that choice rather than override it (I believe Adobe Standard is the default).

A couple of things to notice –
- Amount is grayed out – you can’t change it. The slider is here because you can load Presets from here and those can be reduced or intensified.
- Adobe makes its standard Profiles favorites, but you can change this anytime or add your own as I have with a Linear Profile.
Annoyingly in this section, Adobe’s Presets aren’t distinguished from Profiles except by that intensity slider – they still call them Profiles and I think this is misleading. Profiles are baked in adjustments that can’t be seen in the sliders or changed by the user. Presets can be both seen and changed. Not all of Adobe’s included Presets are found on the Profile Browser, but enough are that it’s confusing. Another confusing point is choosing one of these Presets in the Profiles panel doesn’t show what happened in the sliders, but the intensity of the Preset can be changed. The Presets in the Preset panel show how the sliders change and can have intensity altered. It’s mental. I really wish they’d push them all to the Preset Panel and have them consistently act the same way.
If you don’t want Adobe to override the Profile with its own because you want to preserve Camera Styles you can make it the new default, by going to Edit-Preferences like this –
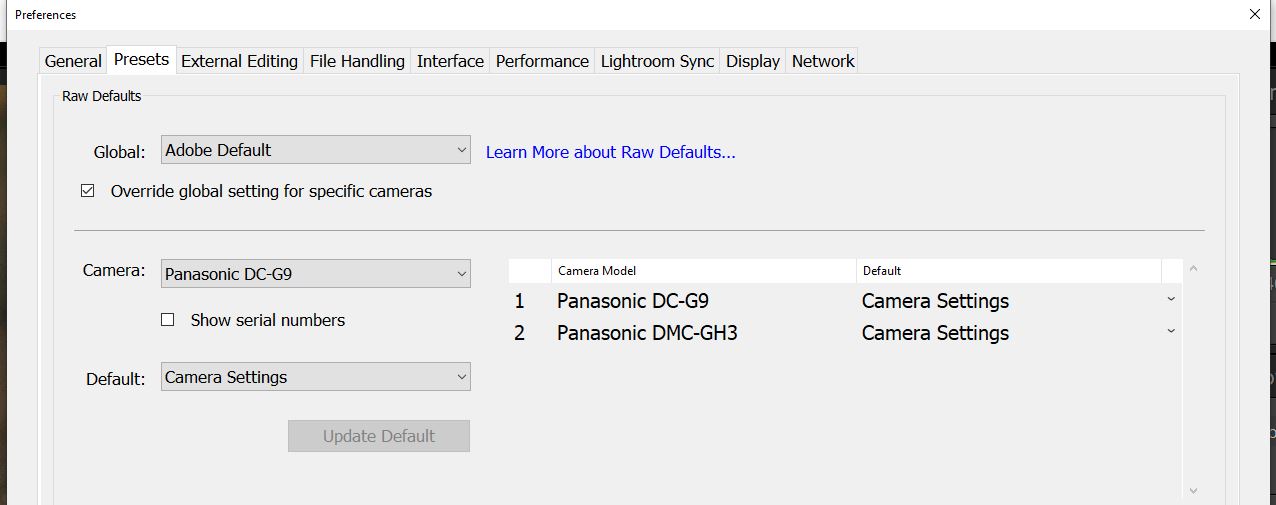
Clicking the box Override global settings for specific cameras will bring up a list of the cameras it has detected in your Catalog. Find the one you want and then choose Camera Settings and create the default. Now that will be the Profile used on all your photos from that camera. You need to do this for each one individually. This is most beneficial if you really like a particular style of image your camera produces and you don’t want to change that baseline. Be careful not to change the Global Settings – if you do the Adobe RAW Profiles will disappear and you’ll be left with basically Color or Monochrome. If you accidentally delete your Camera Matching Profiles, go back and make sure the default for your camera is set to Camera Settings and not Adobe. For a detailed set of instructions visit Adobe’s website.
Oh and this might depend on the age of your camera. The Camera Matching settings are an approximation developed by Adobe and seem to be fairly recent. My G9 has its full complement, but my GH3 has none.
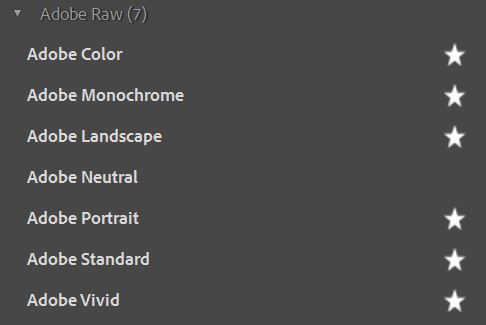
So back to the Profiles Browser. Underneath the Favorites are more – the basic RAW development profiles that underpin how an image looks to begin with. You’ll notice that Adobe has Neutral as well and hasn’t elevated it to a favorite. I think it’s because it’s a pretty flat image and we’re accustomed to high contrast and deep colors even when we haven’t done any editing.
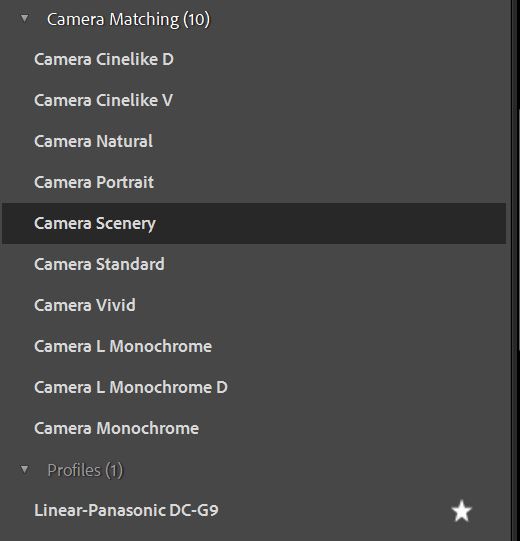
Under that are the Camera Matching Profiles which correspond to whatever camera you used for the shot. By having them here it means that you can change on the fly to another setting to begin your processing with.
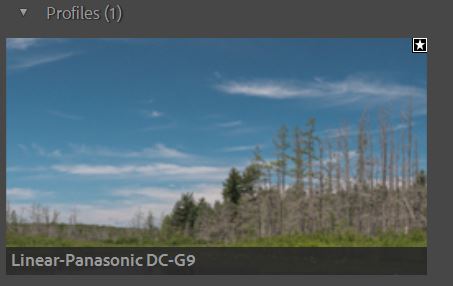
Any 3rd party Profiles you download will be slotted into their own separate section as you can see here.
As you play with these, you’ll begin to notice just how much of an effect your camera has on your RAW files (they’re not so RAW now are they?)
So how do they compare? What does each Profile change? Click on Grid or Large instead of the List view and you’ll see. Hover your mouse cursor over one and it will apply it to your photo in a quick preview –

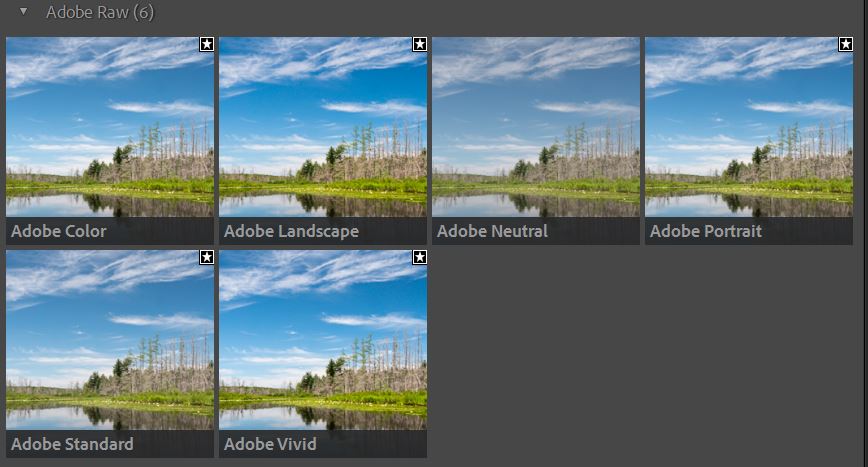
The differences are a little hard to see in these small screenshots, but you can tell they are not the same. It’s especially noticeable with the Linear and Neutral Profiles.
The thing to realize is that your develop sliders are going to behave differently with each Profile. The Profiles themselves have already affected each slider without giving you the ability to alter them. That’s why it’s so important to choose a Profile that will give you the best place to start.
If you have a bright/contrasty image that pushes the boundaries of the histogram to the edges, that might be Neutral or Linear. To our modern eyes, soaked in high-contrast and color-saturated movies and photos all the time, these can look dull and lifeless. What it’s really doing is not adjusting your curves layer at all. So any highlights or deep shadows stand a better chance of recovery and nuance in processing. Same with colors and mid-tones. Be prepared to crank your sliders more than you usually do with other Profiles. This is because none are pushed behind the curtain so to speak. You are starting with less hidden input than any other Profile.
Well that’s it. My dive into RAW files and how they’re not really RAW. I know everything has to be called something, but I wish there was another term for a file that’s come out of a digital camera. DCF maybe – Digital Camera File. To me it’s less loaded. RAW implies untouched or unchanged. Uncooked. But as you can see that’s not really the case. It might be unedited, but it isn’t RAW.

I never knew this existed – thanks for that!