
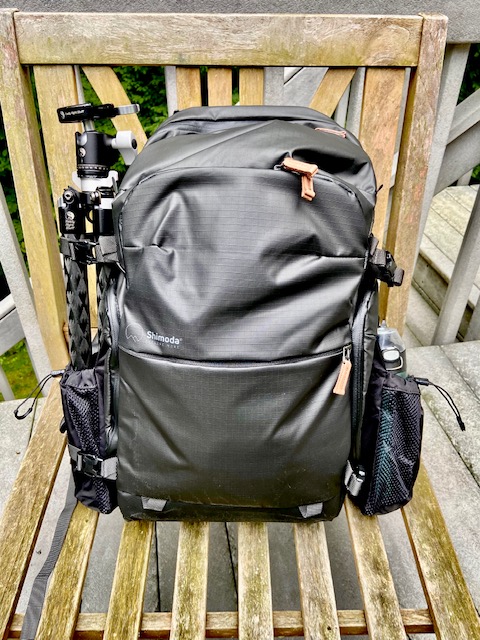
Back in 2002 I bought my first photo backpack. A Lowe-Pro that has served me well and been all over the world, but it’s getting full and a bit awkward for me to use in the field. I blame scope creep – that I’ve acquired a lot more gear since then and actually use most of it every time I go out. For a few years I’ve casually eyed different backpacks and even had another Lowe-Pro in my B&H cart, but didn’t pull the trigger on it. There was something wrong with all of them that kept me from committing. Then in the late summer 2021 I ran across a KickStarter campaign from Shimoda and fell in love. Behold the Explore v.2.0 –
I’m not affiliated with them, but thought I’d share my first impressions, weathered deck furniture and terrible photos.
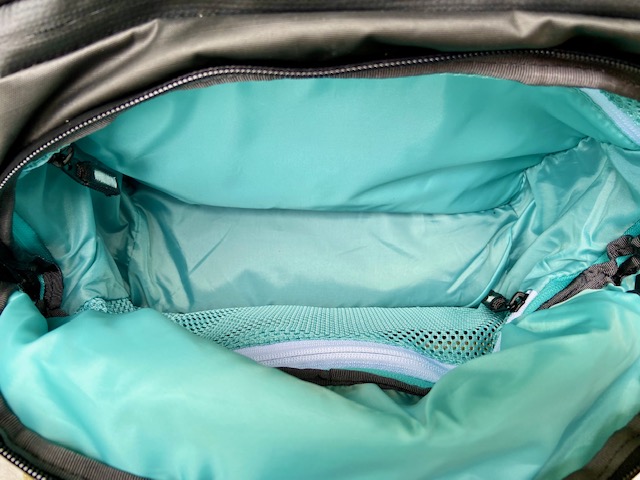
Ok, granted I have only used it once, but I already think it’s pretty great. A big selling point for me is the two stow-able and drainable pockets on the sides for a water bottle and a tripod (or a spare pair of shoes, or whatever…). One of my biggest issues with most camera backpacks is that they allow for just one – tripod or water bottle – which will it be? Also that they have very little free space to jam in weird stuff, you know like bug spray, first aid and safety items, lunch or – gasp! – a jacket. Just above the gear box (which, I think is a better term than core unit, but whatev) there is an open compartment in the top that is just one big space – no dividers. That’s one thing that kept me clinging to my (still serviceable, but no longer clean) LowePro. That and the fact that a lot of camera backpacks are just not real hikers’ packs. They’re for urban treks from Starbucks to Panera and then back on the subway for home. There’s very little structure or a decent harness that distributes weight. With the tripod (but no water) the thing weighs 24 pounds fully loaded. So narrow straps and some flimsy little nylon belt around my waist isn’t going to cut it. Also, many seem geared for electronics more than camera and hiking equipment.
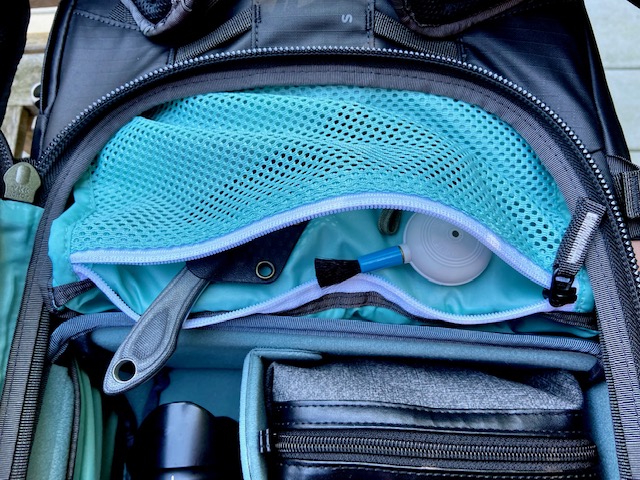
But it does have a nod to tech with a pocket for a 16” laptop that doubles as a space for a CamelBak if you so desire. There is a zippered opening to pass the hose through and some rings on the front of the straps to keep it where you can drink easily.

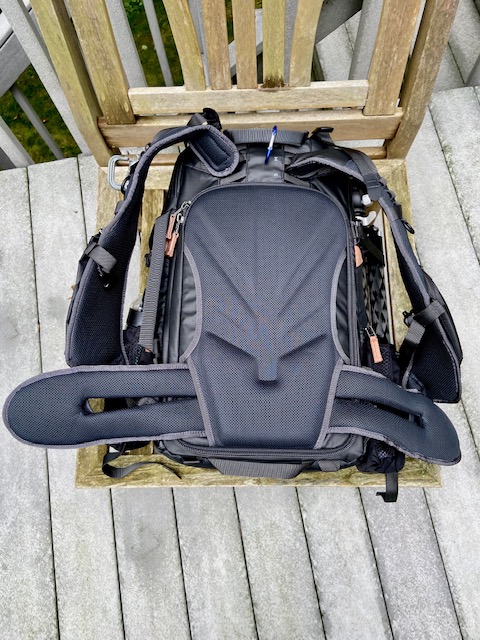
Let’s talk about the harness – a big selling point for me was that it’s adjustable – yeah, not all people on earth are 6-foot, 200-pound men with starter bellies. I have it in the middle because that’s where it’s most comfortable so far. Moving the top of the straps from one spot to the other changes the height between the shoulders and the belt about 3/4 of an inch. It has a generously padded and removable waist belt that really works and cinches tight enough on me to put most of the weight on my hips where it belongs. The fit is customizable to sit the pack close to the body and balances nicely. I have the women’s technical harness on the way – it was an option in the KickStarter campaign and is the same, but has two chest straps. One goes above and the other below the girls. I’ve never had a backpack company (or really almost any manufacturer) take women’s anatomical differences into consideration before and it’s great. Seriously, try finding decent motorcycle gear in the 1990s that actually fit and protected me. You demanding women, wanting to be safe and have stuff that fits.

Terrific pockets and stuff on the straps themselves and a nice comfy back plate. Aluminum tubes that make up the inner perimeter frame and the core unit for the gear is rigid, but not bulky with very soft felt on all surfaces, and the Velcro grips really firmly. You can leave it open or use the zippered cover shown below. I have it open.
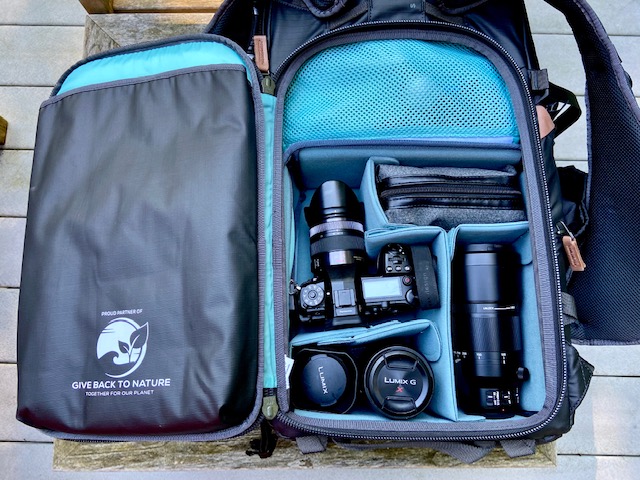
I went with the 30 liter medium mirrorless core unit gear box (no really, they should change it to that). There are many other configurations available and the other color is Army green. It has a lot of pockets and you can even get to your camera from the side if you want. Thoughtfully, they have made a sleeve to house the core unit side door which zips closed if you decide not to use it. Don’t put your tripod on this side if you want to – a water bottle should work though.
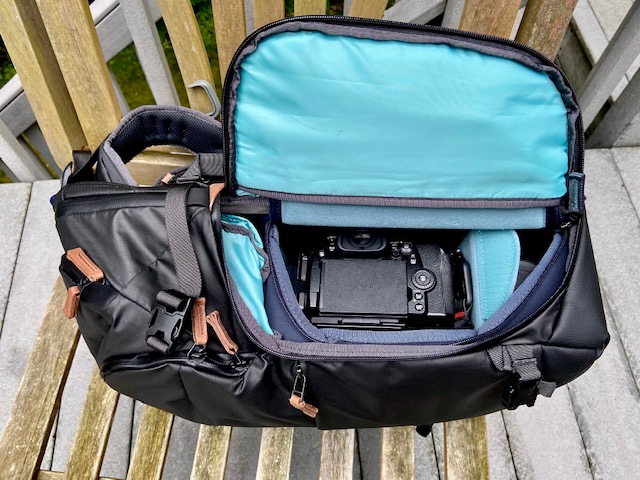
Otherwise it lays flat down and opens in the back. It has three carry handles – top, bottom and side. Great for moving the thing while it’s open. Oh and don’t you love the light blue interior? So much better for actually finding the stuff you cram into it. Thoughtful is a great way to describe this bag. I can tell actual photographers designed and put it together. Not just photographers in general, but landscape and nature photographers in particular. That thing about moving the bag when it’s open is a case in point – I do that all the time, but it’s sometimes awkward. This bag makes it easier. If you have it set up well, that is.

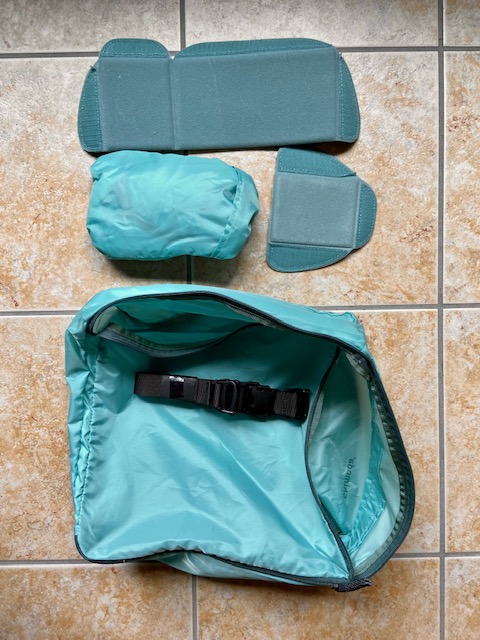
There’s a cover that fits over the core unit to keep your gear even more secure and it came with some extra straps if you need to carry camping or sporting gear as well and there’s a rain cover. I think these last two were bonus items for funding the Kickstarter campaign. Nice.
Happy trails to me!
First Hike –
After an hour or so my shoulders started to hurt because there was too much weight on the straps. Tightened the waist belt and pulled the pack closer to my back and it was better. Overall I have better access to my gear when the pack is off, but I miss the side pockets on my LowePro where I could keep a lens in each and switch without taking the pack off. With this one the way it’s set up, I have to lay it down and open it to get another lens. Hm. Will have to think about this. If I carry the camera and/or the tripod, I could put two lenses in the space where the camera would go and get to them from the side. Will have to try that.
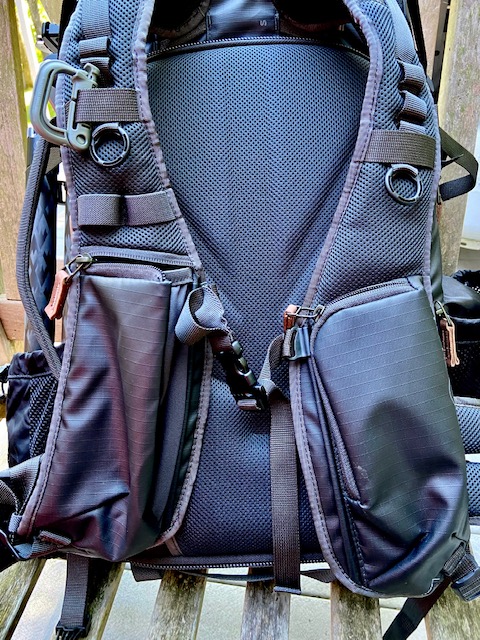
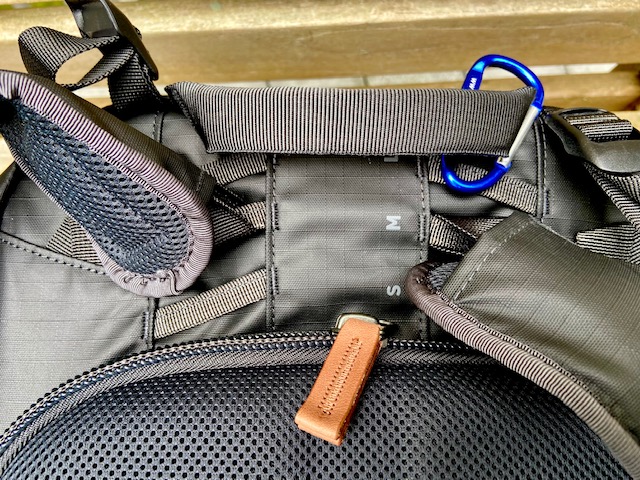
The strap pockets up there are reasonably useful. The one that expands is good for sunglasses. The flat one for batteries, lens caps or a cell phone (I have an iPhone 11 that fits fine). I attached my grimlock that I’ve had for ages. Since I hate neck straps and have always used a wrist strap on my camera, it can hang there while I hike. I also use it for hats and gloves in winter. It locks closed and opens quick. Very handy.
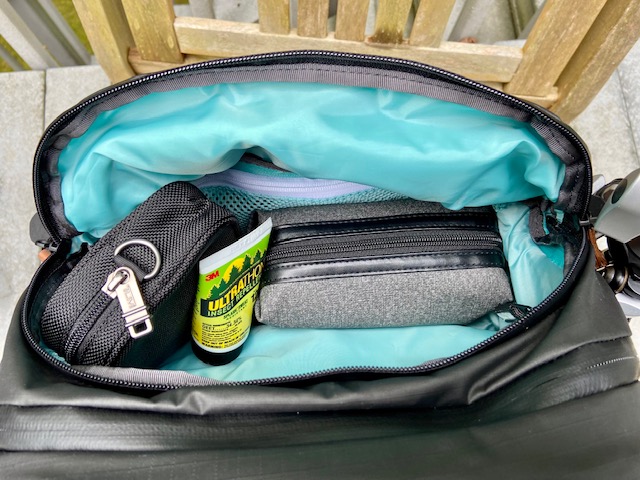
After my first outing I had to reorganize it a little. I have a small rectangular bag that holds filters, batteries, spare SD card, cable release and a few other bits. It moves from bag to bag so I know I always have the essentials. I stuck it in a top section that can’t be accessed through the back so I have to close it, stand it up and then get to filters or a lens cloth or whatever. There is a mesh pocket that is just above the core unit and accessible from the back that I could make use of, but it doesn’t expand far enough to take my accessory bag. Right now it has a brush and my neck knife so I remember to actually wear it. This will undoubtedly change as things progress. Seems like a good place to put depleted batteries.
So here is my reconfiguration – I can still get to the camera from the side, but I’ve put the accessory pack in the top. That means that two lenses rest side-by-side in the bottom. I could maybe get a divider between them, but for now I’m not worried about it. The G9 is in there with the 12-35mm f/2.8 attached and the lens hood in working position. I can also get the camera with the 35-100mm f/2.8, but with the lens hood reversed for storage. The 100-400mm sits alone. I don’t bring it everywhere, but put the kit together so that I could.
With the bag open you can see the laptop/hydration bladder sleeve in the door. Using the core unit cover should protect against a leak somewhat if you’re worried about that.
I’m going to try using one of my CamelBaks next time because when I lifted the bag higher to get the weight off my shoulders, it put the water bottle just out of reach which is another pain since I don’t have a contortionist’s level of flexibility, especially in my shoulders that have each been injured. I could loosen the pack enough to let me get the water and put it back, then tighten it up again. More fiddling is required.
Overall though it was a good experience. Fully loaded the bag is comfortable and the weight well distributed. Laying the bag flat down gets it dirty fast, but it cleaned up with a wet paper towel. So far so good!
I think it starts shipping from Shimoda’s website and from retailers in November. If you’re in the market for a Landscape or Nature Photographer oriented pack, give it a look. It’s so configurable that I’d be shocked it it wouldn’t work for you. It comes in one larger and one smaller size, too.
Update!
The phone does fit in the harness pocket, but it’s very tight and I continually hit either the volume resulting in nearly deafening myself while listening to an audiobook, or hitting the power button so Siri thought I was trying to talk to it. Annoying and unworkable. If I hadn’t been trying to listen to something it would have done the same thing and wasted battery power (I usually don’t listen to anything while hiking, but glad I did for the experience). The expandable pocket on the other side held my Oakleys quite well and I ended up using the phone one for batteries and the lens cap.
Also, you’ll need to remove the bite valve from your hydration system in order to thread the tube out of the back and down through the loops. I was too lazy to try this. The water bottle pocket really needs to be tightly cinched or it swings and sways and bangs against the bag in a most annoying manner. I did manage to get it in and out without taking the pack off though, so progress!
Another update –
I’ve been using this pack quite a bit lately and I think I’ve got it dialed in for comfort and utility. Getting to the camera from the side panel is easy and if I’ve got the rig on the tripod, I stick another lens in the space and can swap quickly without totally taking it off.
The other day I had it out in a light rain and it did beautifully. The pack itself is water resistant enough that I didn’t bother with the rain cover although I had it with me. The zippers are shielded by the pack material and not exposed to water directly and I think this helps with keeping the interior dry.
I’m coming to love this pack and I’m really glad I bit the bullet with the Kickstarter campaign.
It fits!
This is a shot of the bag in a regional jet overhead bin –
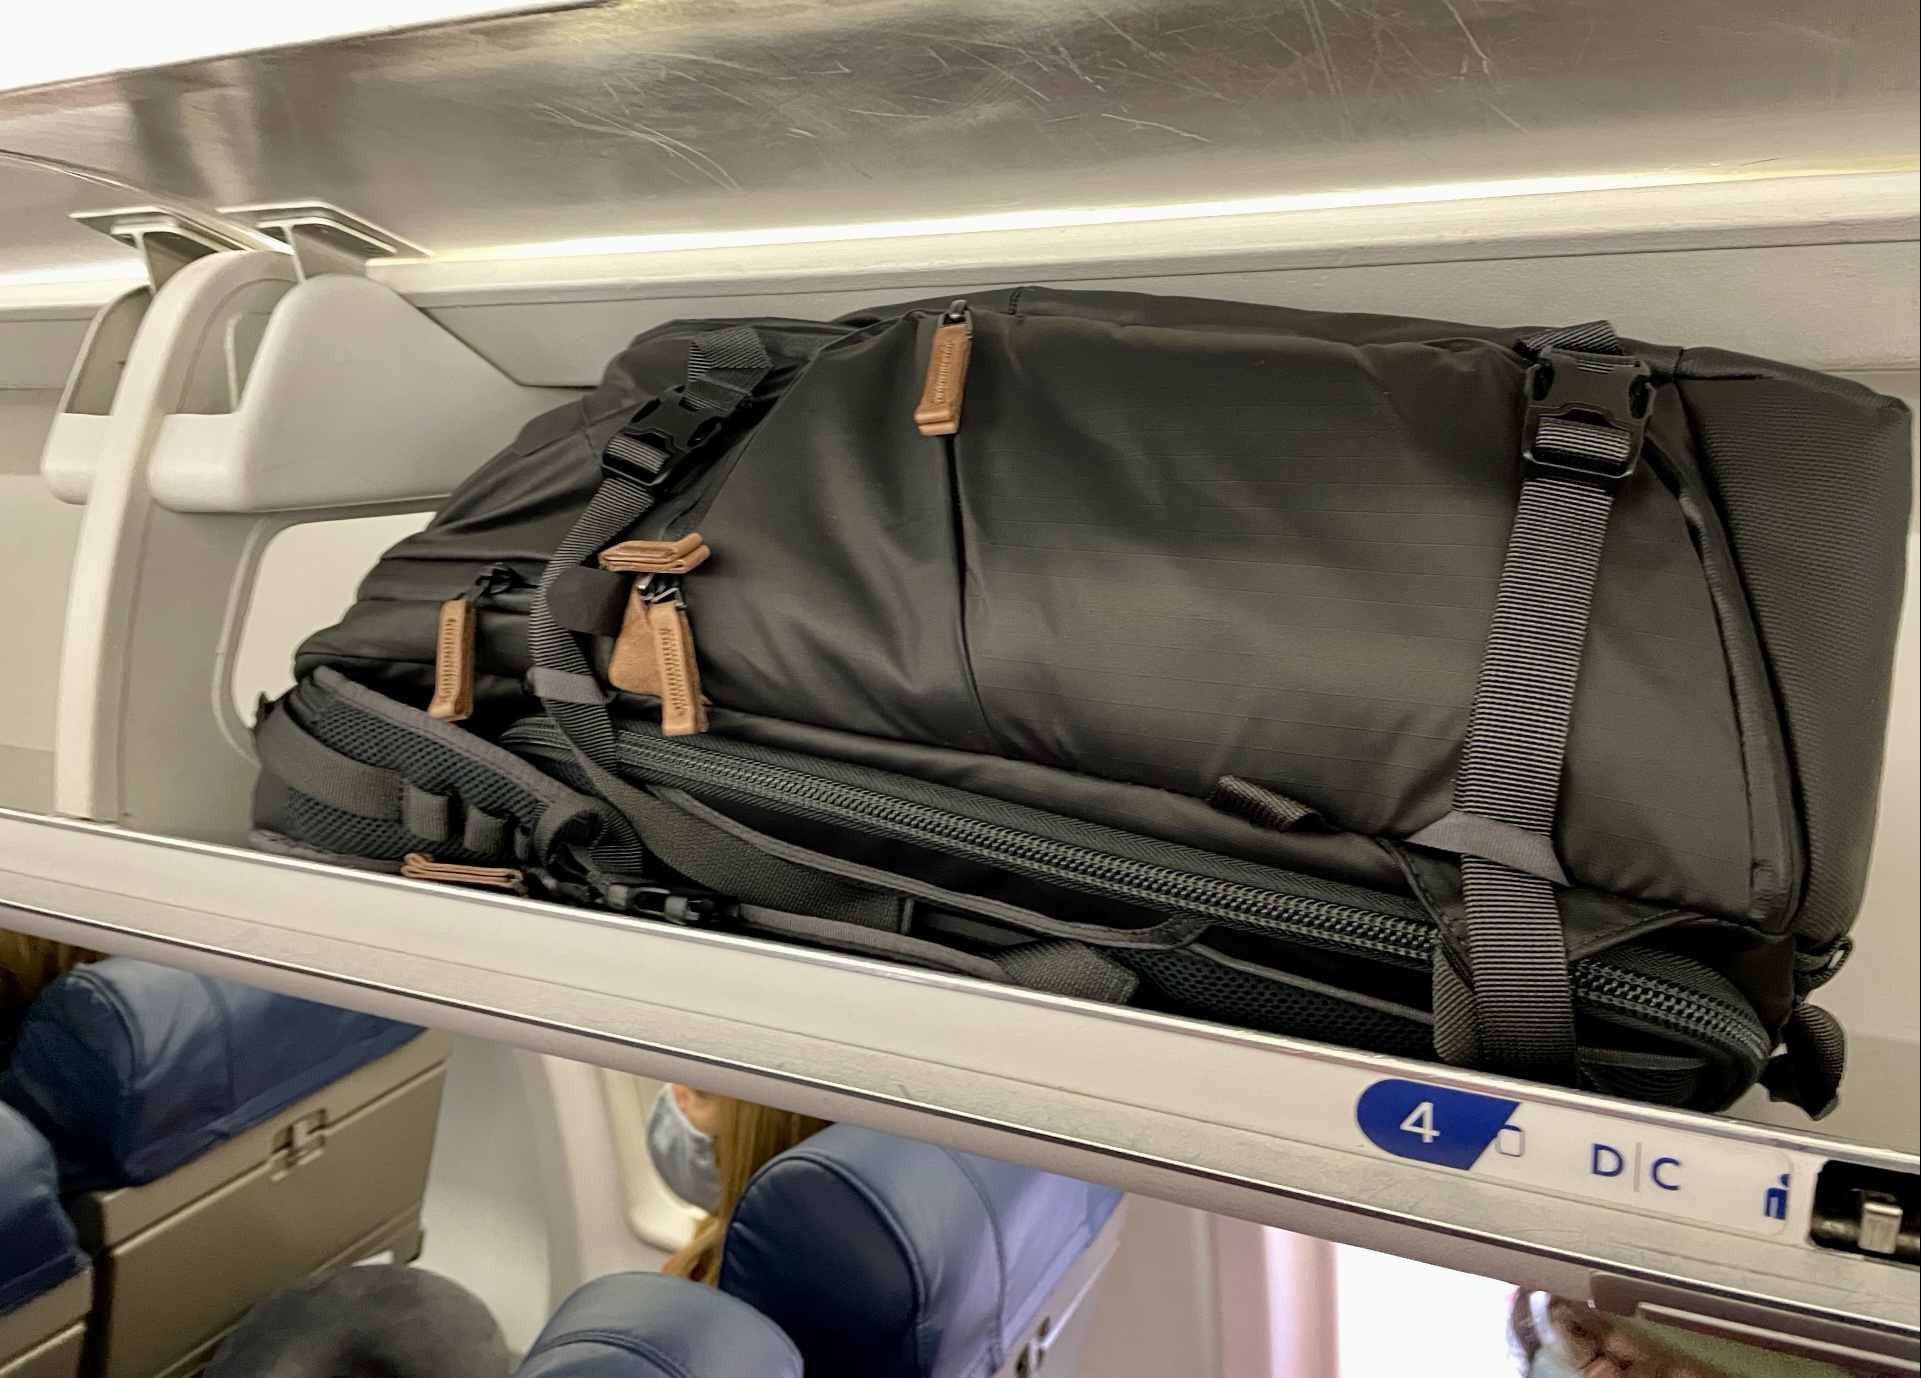
The tripod is strapped to the other side. Would you believe it?? I was amazed and relieved.
With the waist belt removed it is more manageable and while a little tight going over my suitcase pull handle, the side strap worked and it was easy to get from the car to check in. This is one great backpack.
