
A few weeks ago I came across a discussion thread about camera features people don’t use and it was quite enlightening. Modern cameras do so much that it’s difficult to use absolutely everything. Besides that, many functions are specific to certain areas of photography that may not be your bag, baby. A lot of unused features mentioned surprised me, like Custom Modes. So many people never use them. Crazy! Or various kinds of bracketing, which I do, especially focus. The King of Unused Features though was video. Again, strange. I’m not hard core, but I am trying to use video more and have some plans to incorporate stills and video into some projects like Ripley Creek, one of my favorite haunts. Even though I’m one of those people who does use many of the mod cons on my camera there are some things I don’t –

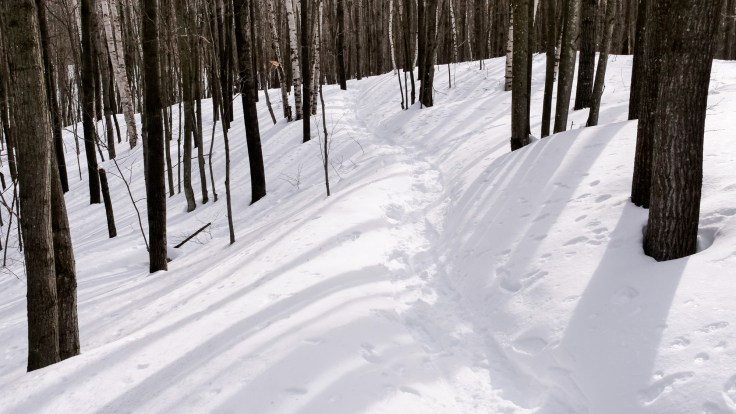
So I went snowshoeing with this list on my phone to try out at least a few of them. Surprisingly it was a lot of fun even though I didn’t use them all. For example HDR and High-Res just aren’t needed for monochromatic winter landscapes. For some reason I used Program and Filter modes, but not the hybrid iA+ mode which stands for Intelligent Auto Plus and adapts what’s in your composition to a particular Scene type automatically. Portrait, sunset, food and night are a few to help you get the idea. I’m not sure how useful that will be for what I shoot and I bet if I use it I will land in macro or scenery pretty much all the time.
So, what did I play with and what were the results?
Jpeg
Some of the features I wanted to try required jpegs so I set the camera to RAW + High quality Jpeg and basically left it. Because the photos later on in the post are all edited RAW files, I thought I’d show some SOOC or nearly SOOC jpegs to start off with. I probably won’t ever do this again since I don’t hate processing my photos, but if I did or wanted to drastically cut down on the amount of editing I felt like doing, it would be a viable option. Especially that I don’t print bigger than say 20×30 or so.


Program Mode
The much-maligned P on the dial. Real photographers only shoot in M, don’t you know? Ha! Since Program is a basic setting that other things can ride on, I decided to leave it in P for the whole day. Program mode is listed as Normal in Lightroom under Exposure Program. That’s funny. But it isn’t necessarily set it and forget it. Variables like aperture, shutter speed and ISO can be changed and exposure compensation is also an option.

Mostly I changed aperture and occasionally shutter speed and ISO, but once the change was dialed in, the other values reset according to the algorithm. There is no separate button for overriding variables, you just use the dials to change aperture, shutter speed or hit the +/- button for exposure compensation. I set that to 1-1 1/3 stops over to get the snow right. I found P useful in order to concentrate on other things besides camera settings when I was out in the woods. Mostly because the settings the camera chose were fine for the types of images I was making. When they weren’t, I adjusted quickly and that was it. I can see myself using Program mode when I’m not fussed about any specific aspect of the photo except getting it. I also used a curves adjustment in camera – some of the shadows were getting too deep and the whites too bright so I set it to a reverse curve that lifts shadows and lowers highlights. It worked very well and it’s something I use occasionally anyway in contrasty situations.
B&W Preview
As a result, composition and framing got a lot more of my mind share and also using the other features that I wanted to play with. Two of those helped with composition, one more than the other, but I think that was because the scene was so contrasty and basically colorless. The less important one was Monochrome Live Preview, something pretty useful for composing with luminosity rather than objects or color. In terms of making stronger statements with photos, luminosity is king. It’s harnessing the natural way we look at photos (light areas first, dark areas after) and creating a map to guide the eye through the shot. Color is a trap for the eye and so you have to compose with it as well if you’re going to use color in the final image, but sometimes bright areas compete for attention with color and having balance is key. If you intend to produce black and white photos, Monochrome Preview is an unbeatable way to set up and compose your images to best effect right out of the gate. Something we did not have in film days. You just had to imagine B&W and after a while, if you shot enough Tri-X you could pretty accurately gauge the shade of gray any color would be on that film. Sadly, I’ve lost the knack and so this is something I would like to incorporate into my routine.

Aspect Ratios
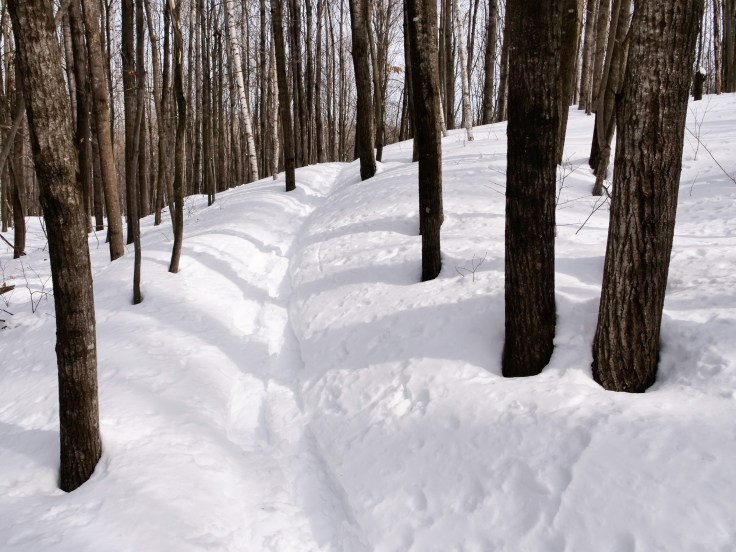
But since the woods was basically monochrome anyway, that feature wasn’t extra helpful. Instead I used a variety of crop ratios in camera to help visualize the best presentation. I don’t know why I never tried it before since I don’t keep every photo in a 4:3 aspect. Lately I’ve been using 4:5 quite a bit and wish the G9 had that one built in as well as the ones it does have – 3:2 (35mm film dimensions), 16:9 (modern cinema dimension) and 1:1 (some medium and large format film dimensions). Changing aspect ratios on the fly helped me hone in on the strengths and weaknesses of a composition and after an hour or so using it, I automatically switched when I realized 4:3 was not optimal.

When you do in camera aspect ratios with the G9, the pixels aren’t thrown away (in RAW, with jpgs they are). The image comes into Lightroom cropped, but if you go into the crop module, the rest of the photo is there. So glad I know this now because I was taking “extra” shots to make sure I had the whole scene and not just the cropped one. Not especially important for some of the wider ratios, but the 1:1 would cut off a lot if those pixels were thrown away. Now I know that I don’t have to take those safety shots and fill up my storage for no reason.
Double Exposure
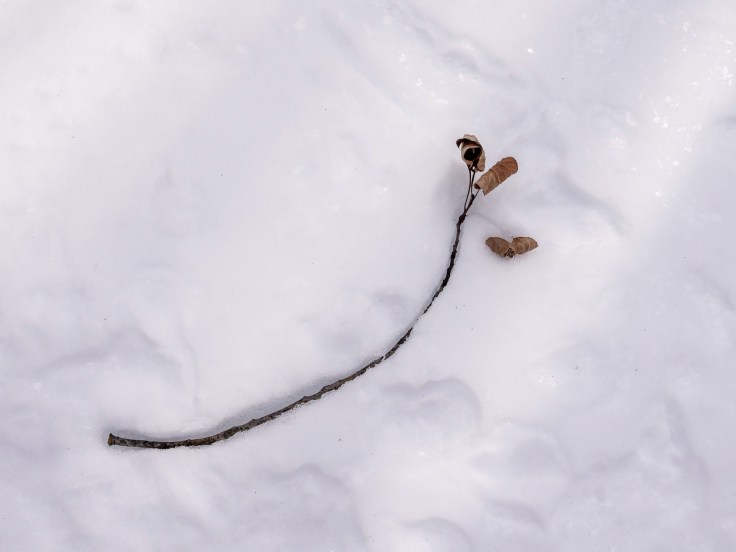
Even though the G9 can handle up to 4 images at a time for composites, I stuck with two. Mostly because I was having a hard time finding good subjects. Only one came out anywhere near decent, with the others just looking bloody strange. Still, I’d like to play with it a bit more. If I’d wandered down to the lake itself which was near where I was snowshoeing, I think I could have used a scene there as part of a blend. Luckily there is likely to be a lot more winter around and I can try it again.

The fun part is that you can do it a couple of ways. You can choose an image that you’ve already shot (provided it’s a RAW file and on the same memory card) or you can shoot new images one after the other. The first photo is shown as kind of a ghost image over the next scene you compose and you can see how the two will layer together. You can also let the camera judge exposure for each one and blend accordingly if you want which is what I went with rather than underexposing each one. In retrospect I think I should have done that since one of my sandwich ingredients got really overexposed. I swear you can see the noise without enlarging it at all.
Filters
Just like Instagram, cameras have built-in filters and the G9 seems to produce them for RAW and jpeg files. As of this writing though it was hit or miss. Only some of my RAW files have a filter applied and none of my jpegs came over in the import. I could have sworn I had the “Treat jpeg files next to RAW files as separate photos” button checked in my Lightroom preferences. I hadn’t so I fixed it and snapped the SD card back in for another import.
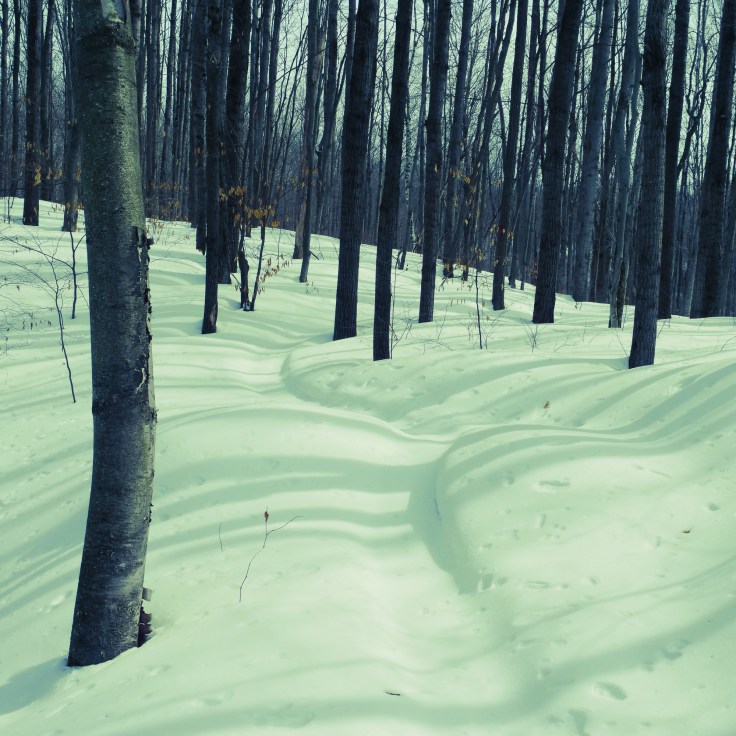
But the filters can be fun and yield unexpected results. Like the Fantasy filter just made everything crazy blue.

The Sunlight filter adds a strange sunburst type artifact in the photo and I accidentally got it to move around on the screen, but could never figure out how I did that so it wasn’t in the right position to use again. I just now picked up my camera and figured it out. It’s a setting on the back screen and you can adjust placement and size of your sunburst as well as overall color temperature. OMG I feel so silly, but I was looking for something in the viewfinder or that used buttons and dials not the touch screen. Oh well.

As it turns out I didn’t adjust the effect of any filter I tried although they can be. I’m going to have to play with them more to see how much fun it is. Here are some examples with in-camera 1:1 cropping –


So that’s it for this time. Not sure how many of these will stay in rotation. Probably just the aspect ratios. If spring ever springs that will be the time to try HDR, High-res and iA+ functions and see how they might be useful or at least fun to try out. Keeps things fresh!
Hit me up in the comments with functions you don’t use, I’m seriously nosy!
