
Ripley Creek that is. If you’ve been following me for a while, you know this is a favorite spot of mine and that I’ve wanted to explore further upstream than what the trail allows. Before leaf break is a pretty good time to try so I did just that the other day. One side of the stream was more open and easier to get through than the other which is basically an overgrown boulder field. Guess which one I chose?

And a look from just beyond those far rocks to back where I stood for the first shot –

I did some drastically opposed processing for these just for fun. Recently I’ve been watching videos by a photographer who talks a lot about using luminosity to create mystery in a photo. By that he means to restrict the light parts to just a few in order to make a viewer study the photo longer. If a lot of a scene is dark with only a little bit of light, you will need to look longer in order to take it in and understand what you’re looking at. I’d never considered that kind of approach before so I’ve been turning it over in my mind, wondering where I can apply it to what I shoot. It could be an interesting technique for mushroom photos as well and give me just the change I’ve been longing for in that part of my work. A person can only take the same photos over again for so long, know what I mean?
Another exercise is this Boulder Study –

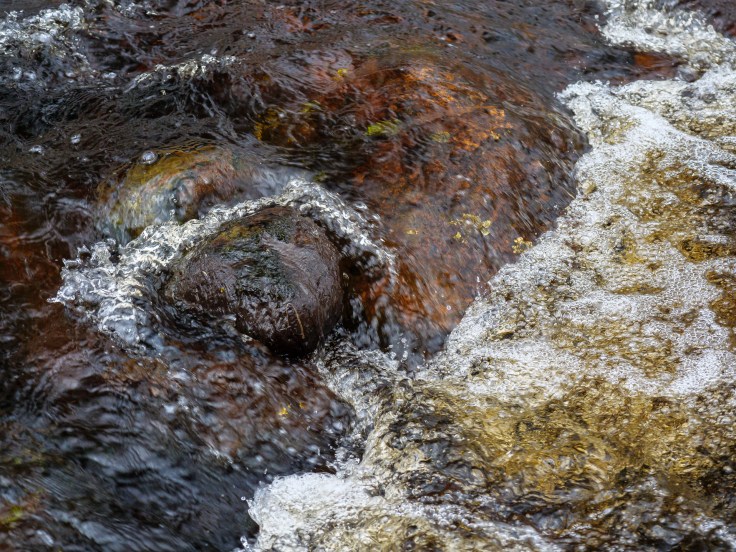
I like the way different shutter speeds affect how you react to a photo. A challenge for me is to make short exposure images, or even freeze-frame type shots, seem deliberate and not like snapshots. Beginning photographers and folks who only use cell phones for pictures, don’t know much, if anything, about shutter speed manipulation and without a tripod can’t begin to achieve the results in this post. That’s why I think that stopped action photos can seem offhand. They can convey a sense of power that slower shutter speeds don’t though and so I’m looking for ways to make the choice more considered and not like luck. Yeah, good luck with that! This next shot uses a fast shutter speed and I deliberately chose to use one because I felt that it conveyed freshness and cold water. I’m still on the fence as to its effectiveness. It’s a cute little cascade though.

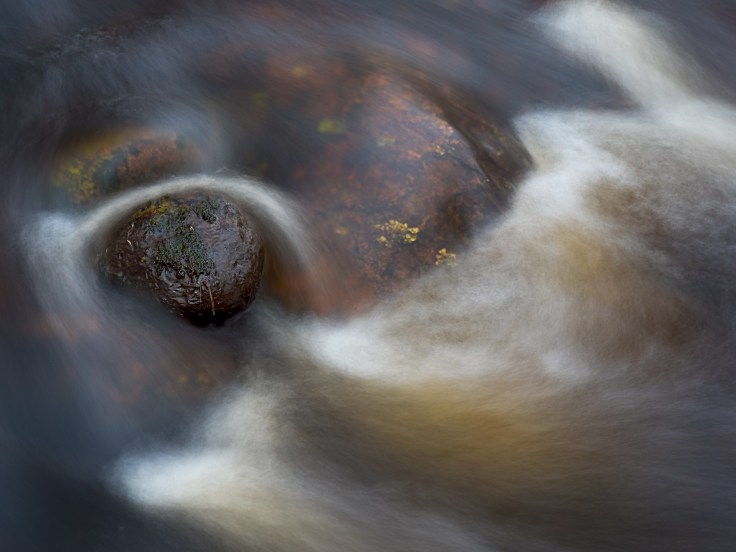
Since I love playing in flowing water I decided to have more fun with shutter speeds. Unfortunately I hadn’t yet received the set of magnetic variable neutral density filters I ordered, so I just used what I already owned – a circular polarizer and a 6-stop ND, both made by B&W.

If you look closely you can see I moved slightly left to get the long exposure shot. It has more separation between the tree trunk and the rock which I thought would be important for the balance of the composition. It’s also a 2-shot panorama stitch, something I hardly ever do, but have on a loose list of things to try this year with my photography. Probably I could have done this with a wider focal length (this is the 100mm end of the 35-100mm, so I definitely could have zoomed out), but there is a tall, pointy rock just out of frame on the bottom that I was trying to keep out of the shot. At the time, I wasn’t thinking of doing a stitch, but when I saw both slices in Lightroom, neither worked. Put together they do and I quite like this little bit with all its contrasting textures.
Wicked silky water isn’t everyone’s cuppa, however, so I took a few photos with a faster shutter speed as well. I find it’s helpful to experiment with shutter speed to get the effect you want. My philosophy is this – if there is a distinct difference in texture like with the rocks above, or with ice in winter, I will use a longer shutter speed to smooth out the water quite a bit. Doing this can be beautiful, but also makes the water featureless which can be boring. It also takes the power out of the shot to a great degree. Leaving texture and contour in a cascade retains more energy and action to my eyes and it can be effective to bring more drama and emotion. Granted, this little slice isn’t awe-inspiring, but with extra detail in the water I think it has a different feel –

You can enhance the water’s modeling by dodging and burning to add contrast. For this last photo I used only Lightroom’s improved masking – using a brush and a luminance range to restrict and isolate the adjustment to only certain tonal values. Normally I’d go into Photoshop to use the TK8 panel to do this, but I wanted to see how Lr stacked up these days. It’s pretty good and you can also choose color ranges to direct your adjustment. If Adobe had introduced this level of precision a few years ago, I still might be using only Lr for my editing. It’s come a long way and only getting better.
So if you’re not sick of that little slice of cascade, stay tuned for a quick review of my new filter kit with example photos of different combinations and effects I got using them. And a near tragedy on my first day out with them.

Amazing photography 👌🏻
Thanks much. Ripley Creek is a favorite haunt and I go there often – always something worth seeing!
👍🏻👍🏻👍🏻
Nothing like the spring thaw to bring the magic of water! You’ve done a lovely job here – the 3 variants are especially nice – and I am looking forward to seeing more.
Yeah and what a thaw it was! So much snow in April. Crazy. I’ve got some bird posts coming up and then Turtle Rock creek so more water is on the way.
Looking forward to seeing them!