
Any hiker with a camera knows trail shots are impossible to pass up sometimes. You’re out there, feeling great, in beautiful surroundings and you can’t help yourself. You want to try to convey some of the magic of where you are. The trees, the leaves under your feet, the particularity of why you love that trail; even the air itself. So how come so many trail shots just end up looking like every other trail shot? Here is my top 6 ways to make them more interesting.
1. Point of interest/anchor
While a trail is a natural leading line, most photos can benefit from a focal point to help start the process of leading the viewer through the image.
This one was taken on my way up to some falls off the Kangamangus Highway in the White Mountain National Forest. It was raining so all the colors were saturated and boy did that little group of evergreen fern grab my attention. I stopped and shot this scene immediately, knowing that the roots and ferns would make a great hook to catch the eye in a photo. With that in mind I targeted the camera’s focus on the ferns and selected f8 because it’s right in the lens’s sweet spot and with the rain and bit of fog, I wouldn’t get a totally sharp image no matter how I choked the lens down. The tripod is low, but not extremely so and I did that to get a nice view of the trail ahead, but also to allow for a close view of the ferns. Try scrolling a bit to crop out the roots and ferns. Pretty blah, huh?

You can use any eye-catching element in a trail to serve as your anchor. Rocks, leaves, small trees or bushes, mushrooms, flowers, odd branches – just about anything that you notice on your hike. Just be sure they don’t fix the eye to that one spot, but serve to start the viewers path through your shot. I’ve even put the camera directly on a boulder with leaves on top and it worked quite well.
2. Perspective (extreme high/low)
While I don’t suggest hiking on your hands and knees, getting down there can give you some interesting compositions. This shot in the Manchester Cedar swamp is from years ago, but I remember noticing how chewed up and rough the walkway looked so it was a natural to get the camera down into the leaves with a wide aperture.

A high perspective can be nice, too, but unless you’re 8-feet tall, it’s tough to get much above normal eye-height. That’s why I’ve been known to get up onto big rocks, tree branches or embankments to get just a few more inches. Sometimes it works really well to get that little bit more trail leading out of the photo.
3. Above and below
This takes finesse sometimes. Especially when it’s an open area or one that is fairly uniform and there aren’t many landmarks to choose from. This is a section of trail in the Bridger-Teton National Forest. It’s at close to 9000 feet above sea level and the dirt is such a gorgeous brown that you want to scoop it up and feel it between your fingers. Plus that sagebrush just staggers me every time I walk through a sea of it. The sun wasn’t doing me any favors and my shadow really got in the way. After a few disappointing images, I finally got to this one where the trail points to break in trees. The muted colors against that knock-out blue sky really show I’m not in New England anymore, plus there’s that space…wide open and so American West it ought to have a label.

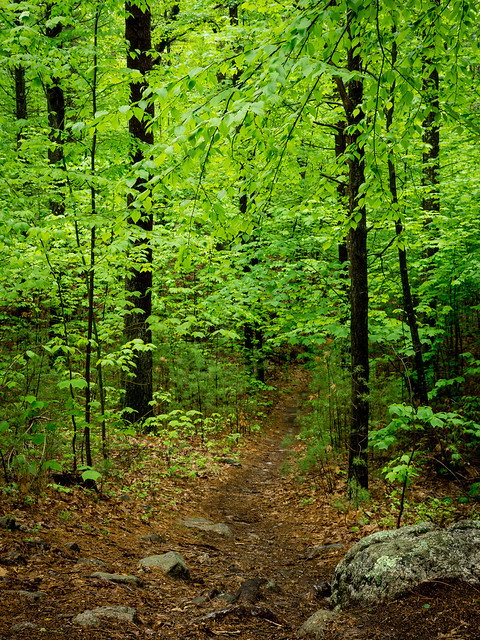
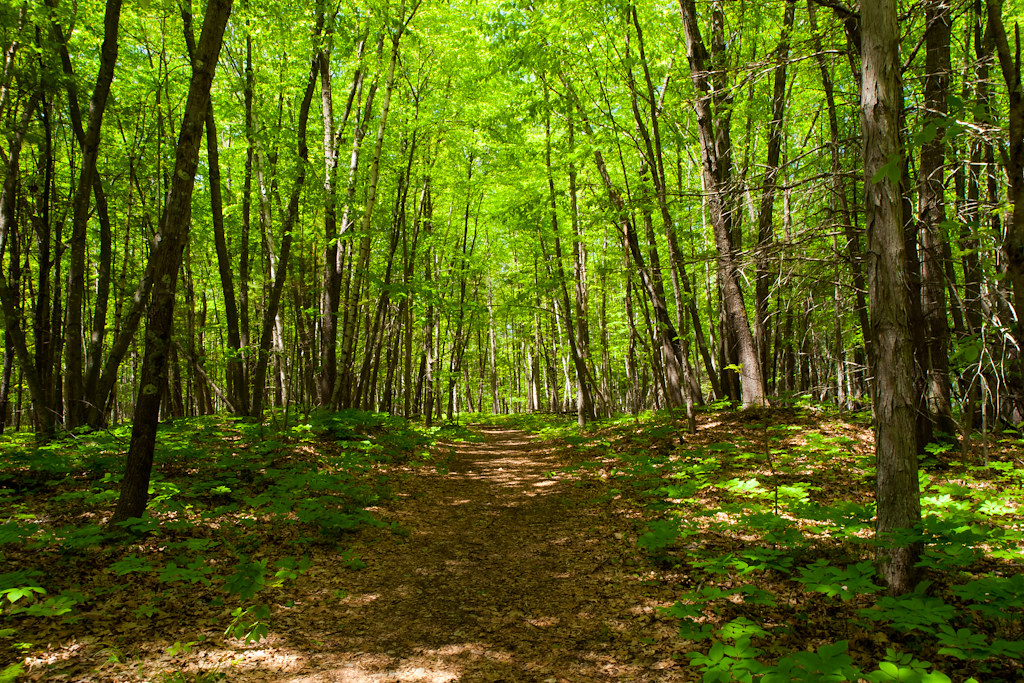
Back in New England, above is often forest canopy. A good way to get both the trail and the lofty leaves overhead is when you come to a hill. Managing dappled sunlight is an art all of its own, but with practice you can get good results.
4. Scale and proportion
Sometimes the trail itself can lend a sense of scale to a scene that is otherwise lost. Even better if there’s a bridge or bit of walkway to use for comparison. Mature redwoods are so far outside the normal human scale that it’s hard to convey just how enormous they become. While walking in parts of the Jedediah Smith Redwood Preserve in California, I looked for ways to show how massive these trees really are and this little bridge was perfect for that.

Go ahead and give your browser a scroll so that you can’t see the bridge. Flat right? A tree and some ferns, so what. Now scroll that bridge back in. Wham! Giant tree.
People can also add a sense of proportion especially when you get the path you have to climb in the shot –
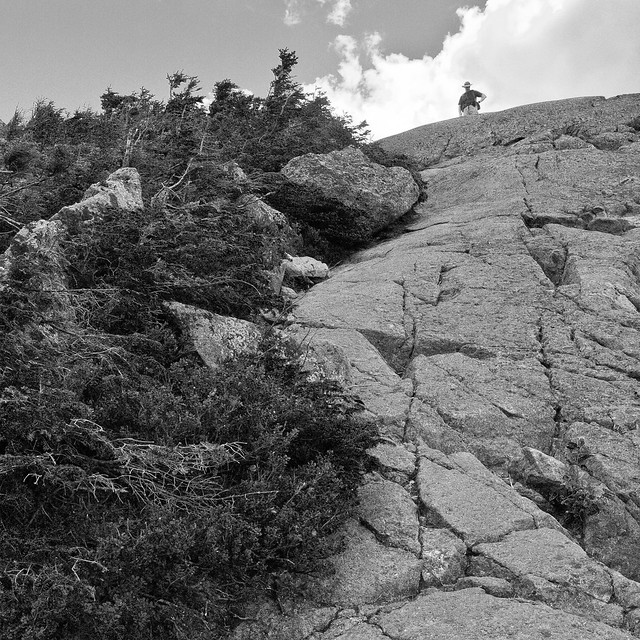
5. People
Not only can your fellow hikers give your photos a sense of scale, they can also convey emotions that you can’t by staying behind the lens. For me this isn’t something I get to do a lot since I’m a pretty solitary person in my outdoor pursuits. That’s why when my husband hikes with me, he comes in handy.
This image was shot on Big Sur in California on a gorgeous day in May when every wildflower in the state blooms. Big Sur is awesome in almost any season, but spring is kind of mind-blowing. It’s warm, breezy and full of so much color it’s like you landed in Oz. I defy anyone to ignore the joy that bubbles up inside and makes you laugh at nothing. Laugh just to be alive and in the presence of so much beauty and perfection.

Without my husband, standing back at the giddy prospect of hiking in all this wonder, it would just be a trail and some rapeseed plants, which is nice, but unremarkable. He didn’t even need to be facing me to convey the emotions we both felt and looking at it brings it all back.
6. Atmosphere
So continuing with the idea of conveying emotion in trail images, how about trying to capture the way the location makes you feel using just the surroundings themselves? By stylistically concentrating the grit and reality whether it’s harsh or mellow you can emphasize the vibe of your trail experience. Now a lot of people are going to think of foggy days or really cold ones with lots of snow and ice. That’s the easy way out and I’ve done it too, but what if you’ve got just an average day in a pretty amazing place? Take some time to really identify what you’re seeing and how it changed your attitude from the time you got out of the car.
When I got to the Bradford Atlantic Cedar preserve, I anticipated seeing a typical cedar swamp with walkways, moss and various kinds of laurel and ferns. I love cedar swamps and have been in a few so I didn’t expect the closed-in feeling I got within minutes of being on the boardwalk. It felt hushed and secretive and soon I found myself walking with a softer tread; trying not to make noise. I noticed the trees were young and thickly laid out on a bed of sphagnum moss. It was overcast, damp and a little cold, but I was enchanted just the same.

On my way back to the car, this composition materialized and I was very careful both in the field and with processing to impart the right mood. The trees press close with their shredded skins, but the boardwalk is smooth and clear; holding the promise of a way out. It isn’t your typical New England fall shot, but it has presence.
So there you have it; a few ways to improve your trail photos. Here’s a quick recap –
- Find an anchor to lead the viewer through the shot; don’t make the trail do all the work
- Change your perspective; mix it up by getting up high and down low
- Showcase what’s above as well as below
- Got a daunting sight in view; show a sense of scale to really wow the viewer
- Include a hiking buddy or two; people can bring a sense of emotion
- Soak up the atmosphere and find stylistic ways to emphasize it in your final image
Did I miss any? What techniques do you use to make your trail photos more compelling and dynamic?

Wicked Dark posts are the best way to start a day ever! It’s 11 degrees outside as I write this … these photos and warm words add enormously to the quality of my day. Thank you.
Great advice…and great pictures 🙂
Love your descriptions, including all the ancient Greek refs. The only comment I would add is that I always prefer it when a hiker in the photo is also facing the view (that is, facing away from the camera, as you did with your husband). Having the person be anonymous makes it universal, plus It keeps the focus on what the viewer is seeing instead of the person becoming the subject.
eeek! thought I thanked you folks, but the bad blogger that I am, I forgot.
thanks much, everyone.