
I’m not a gear hound nor am I an early adopter, but I wanted to write about this very cool system I recently purchased for not only still photography, but especially for video. As I intend to do more with video, I needed to be able to set proper exposure during daylight hours. The only way to do that without cranking the aperture down to nothing is with neutral density filters. The hassle-free way to manage ND filters is to use Variable NDs. That’s the primary reason I bought the set, but the other is for the mist and polarizers that also come with it. The whole thing is magnetic and pretty customizable in terms of what kinds of effects you can achieve.

Note that this is the original VND kit, not the K2 kit that has a square filter holder built into the adapter ring. Lots of photographers still use Graduated ND filters which are generally rectangular and need a holder, but I gave them up with film. Using a Linear Gradient in any robust photo editor such as Lightroom will give you the same effect. There’s also the problem with things like trees sticking up into your sky that you’ll have to deal with by lightening them when you edit. So if you’re going to have to do that a lot, you might as well do it more effectively with masking and other tools. Plus we can now combine bracketed images into one so exposing for opposing areas of luminosity is easy and so why carry extra gear around if you don’t have to? The filters I use are for effects that can’t be replicated easily or at all in post processing.

Being magnetic they are much easier to stack and swap than traditional threaded filters and without the additional headache that can come with those. More than once I’ve had stacked filters get stuck on me in cold weather as the metal expanded and contracted. I have had to carry a filter wrench all the time because I never know when it would happen.
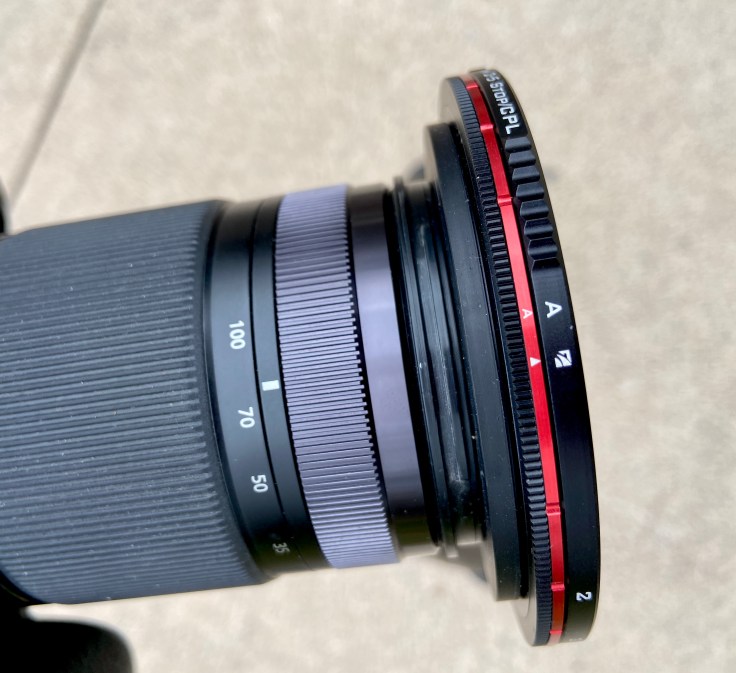
Because VNDs need two pieces of glass to work, the system has two “base” filters that are slightly smaller than the rest. These fit down inside the magnetic ring and provide approximately 1 stop of light blocking on their own. One has a 1/8 mist effect and the other doesn’t. With the stop range of the second filter label facing out, align the A on the filter to the tiny A on the ring and let it snap to place. Now you have a variable neutral density filter with hard stops on either end – all the way off and all the way on. In my experience with an older VND without stops, it is easy to go too far and that causes all kinds of weird banding in the corners. With the Freewell properly installed, you can’t do that.
With the filters turned the other way with the CPL labels out, they become (duh!) Circular Polarizers! One is standard and cuts the light by about a stop and the other is the much darker ND32/CPL. Either can also be used with a base VND for added light blocking power and they turn a full 360-degrees. Very handy and will give me much more flexibility with shutter speeds in the future. Prior to having the kit I had to change the ISO if just using aperture didn’t give me the look I wanted for moving water. With either CPL and a base VND installed, the range of options will be huge. I have ideas about using it on windy days in the forest to blur movement in the canopy and undergrowth.
The VNDs alone don’t have much of the dreaded color cast that NDs all produce by their very natures, but combined with a CPL there is a strong color difference between all the way on and all the way off. It can be a little difficult to see the effect of the filter because of this and that’s my only complaint so far. Color correction is possible in post, but it’s a little jarring to see while using them.
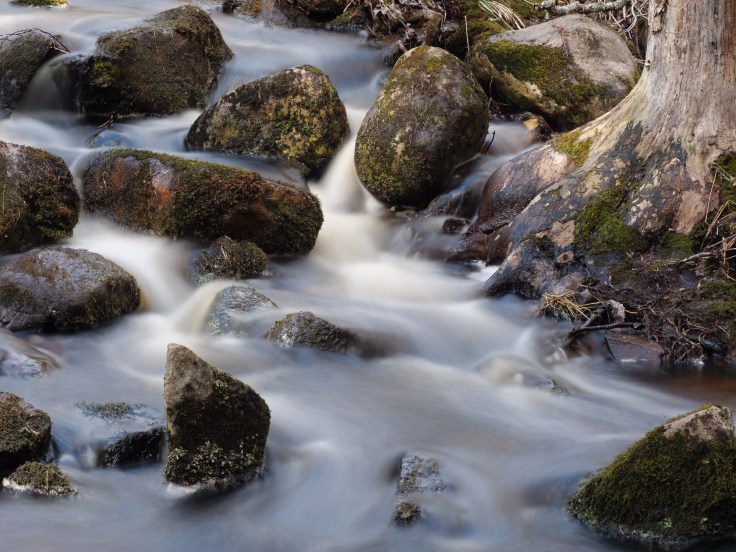
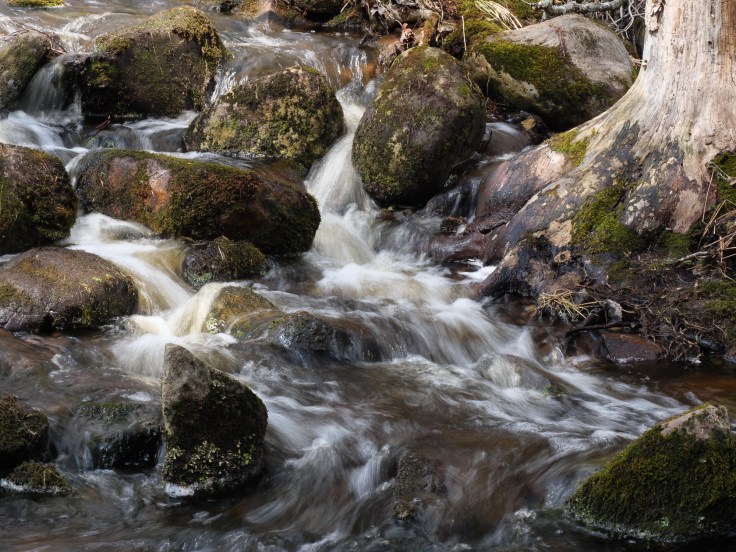
I won’t bore you to death with example photos of all the combinations, but I will offer a few and some observations. My first outing was a favorite – Ripley Creek – so I could test a lot of combinations of ND and CPL. For my kind of brooks and rivers, the CPL is a key piece of the equation. Without it, the water lacks depth and so I think I might really like the darker of the two CPLs, the ND32/CPL. The odd nomenclature comes from the math to figure the number of stops it darkens by which is basically 5 and just about mimics the set up I’ve used for years now. Adding the base VND brings it to 6 and that’s pretty useful during bright, overcast days.
The first two photos here are of similar shutter speeds, but look at the difference in contrast with the CPL added –


The last two photos are just the regular CPL with and without the mist base. It doesn’t really show what the mist effect looks like (future post), but it does show how much more light it cuts.
The case comes with a carabiner that can be used to hang the case from whatever you want and on this trip I attached it to the hook on the bottom of the tripod base. Good idea at first, but then I forgot to hold onto it or remove it when I moved the tripod and plop! Into the water it went swiftly followed by me to fish it out before it sailed downstream. If I had tucked any memory cards in there, they probably would have been damaged, but the filters only got a little wet and the case, too. Which leads me to believe it is not leather, but a synthetic and after drying out looks just as it did when I got it.
So that was dumb, but situation salvaged and on another trip out I actually hung the case from my coat zipper while I walked up and down in the brook itself. It was secure and accessible and made changing filters much easier than going back to my camera pack on the shore each time. Yes I am that lazy.
One filter I haven’t talked about is the Mistx VND base which might seem like code, but has a 1/8 strength mist effect. These were always associated with filmmakers because they diffuse and soften highlights which can be quite harsh with digital video. Other filter companies have made inroads with still photography and the idea of using them piqued my curiosity. No good situation has presented itself for experimenting with this one, so I’ll save that for when conditions arise.
Here’s a look at one of my lenses with the filters attached –


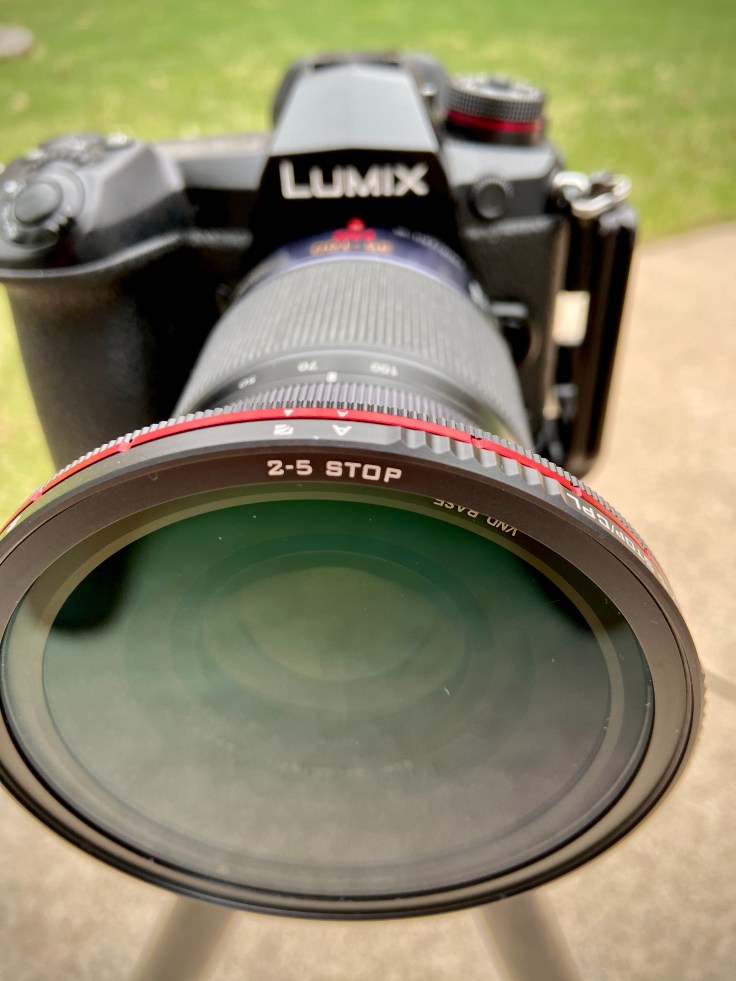


Yep, the filters at 82mm are a lot bigger than the 58mm threads on my Vario G 12-35mm or as shown the Vario G 35-100mm and while the company does offer the proper size, I found this kit meant for a size 77mm lens in a used department at a $100 savings so I grabbed it and a step ring for my two main lenses. Another step ring is on the way to use with the Leica 100-400mm which has a 72mm thread. Since those were about $9 each they were a considerable savings over the price of a replacement magnetic ring from Freewell. Even with the step ring attached it still fits into the front part of the case for storage.
Luckily I can still put the rig as shown into the camera space in my backpack. Kinda. It fits a lot better when it’s on the 12-35mm since that lens is a bit smaller than the 35-100mm. If I orient it slightly differently in the compartment with that one on it fits. Just. That was kind of a concern for me when buying this – the fact that the filters are 82mm versus the slim size of my primary lenses. But that’s just the way it is and if I buy new lenses or switch systems altogether I can still use the filters either with the native 77mm mounting ring that I have or with different step rings depending on thread sizes. Clear as mud, what?
As you can see, using a lens hood is not possible with this system. Also they seem to gather dust like crazy. It probably has to do with the fact that they are magnetic and literally attract all kinds of particles. Keep a lens cloth or brush handy at all times! Because of the opposite polarity in the magnets, attaching the lens cap with the logo facing out only works with the filters in the VND position. If you’re only using one of the CPLs, turn the cap over and it will attach, albeit slightly less firmly than the other way around.
Which brings me to getting them on and off – pretty easy, but sometimes you can take the filter with the cap if you’re not careful. The magnets are secure enough that I feel comfortable walking around with them on the lens. Still, all in all it seems to be the right thing for my needs even with the awkward sizing. They call it “future proofing”, but it’s really just about money. So much easier and cost-effective to make one size product that can be adapted to various lenses. They even make a larger version for monster telephotos.

I’m glad you showed all of the required equipment to use the filters effectively; especially the bug spray.