Update is at the bottom if you’ve already read this post.
My first macro lens was for my 35mm Olympus system and the post about it here is one that gets the most traffic from search. I used it until it started to break and that’s when I bought the Panasonic/Leica 45mm f/2.8 macro. That lens has been great for the most part, but it is quite old with an approximate production date of 2011. It sometimes hunts forever to find what I’ve got the focus point on, and worse, it sometimes doesn’t find it at all, forcing me to go into manual. For single frame shots that’s fine, but if I want to do any focus bracketing, it’s a time waster, especially if I’m relying on natural light which often changes quickly. Plus the idea of a longer focal length akin to my Olympus 90mm f/2 was appealing.
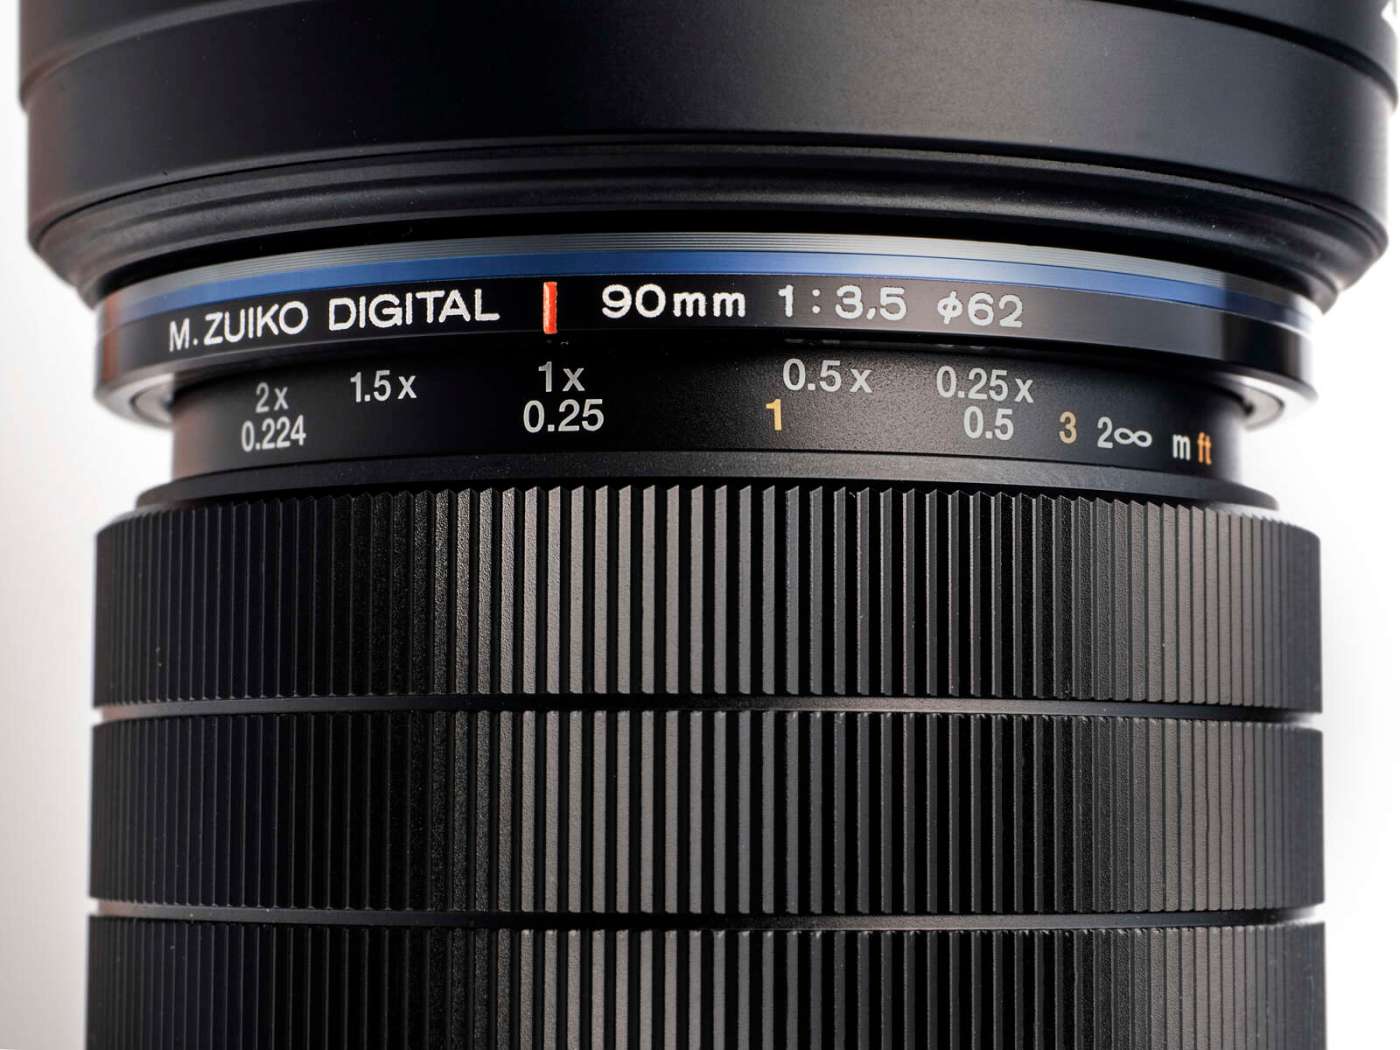
So that’s what got me eyeing the OM Systems 90mm f/3.5 macro released in 2023. It’s been on my radar since then and I’ve kept an eye on the price and due to some folks in my one-and-only photography community posting shots with it, I decided to rent one to use with my Lumix G9 M2, something I searched for, but didn’t find as much info as I would have liked, so thus the rental. Yes, people were shooting with that combo, but I didn’t see any specific reviews of how they worked together as I don’t have plans to get an OM Systems camera.
- Focus bracketing
- Focus limiter
- Stabilization
- Flash functionality
- Video
- Packability
It’s still cold up this way as I write this in early May (30°F in the morning, 45° for the high) and some of the spring ephemerals have already gone by, but I’m hoping to shoot what’s left and maybe some insects while the temps aren’t that high and they sit still. To the left is a list of what I need to do and consider during my rental time (a week). Luckily for me, the rental company will sell it to me at a discount if I want to keep it. Funny that I bought the 45mm from a rental company in their used department and it has been a great addition
There is a polarizer on the way since the thread size is different from anything I already own. One good thing is that I can use one of the many diffusers that are designed to pack flat when not in use. They connect to your flash and then down to the lens itself, forming a rigid kind of tent. Due to the small size of the 45mm I didn’t see any made for it, at least that’s what I assume to be the reason. The option is nice even if I never get one.

Niche within niche – again. The P/L 45mm macro has been around for a long time and it is very compact, has great optics and sharpness, but due to the higher retail price it lost out to the Olympus 60mm macro, even among Lumix camera owners. The 90mm f/3.5 is another niche lens in a niche lens mount, but it also is reputed to have fantastic glass and I’ve seen the crisp detail for myself. Granted those were jpgs on web sites, but they blew me away so I’m expecting great things in my raw files. It will do up to 2x life size by itself and with extension tubes can to up to 4x I believe. I doubt I’ll ever use it regularly, but I have a set of tubes so who knows. I don’t have a teleconverter, which it can also use, but that’s an option to explore if needed.
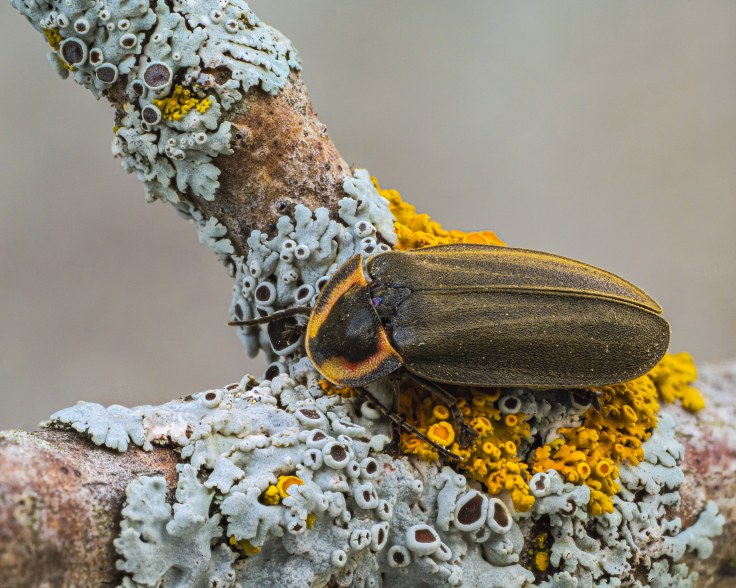
Here are some lovely little beetles I managed to photograph while in the yard or on the trail. The little dark ones are about 5 mm long and the other two are 1 cm, so very small indeed. All but the last one are single frame shots and the Black Firefly in the lichen is a 15-image stack. All with only natural light except the Trout Lily (see further down) which had a little on-camera fill flash. Oh and the focus limit switch is handy; when I was setting up for the Blue Cohosh berry series it was hunting quite a bit so I switched it to the .25-.50 meter setting and that solved the issue really quick. I have a feeling that’s going to be something I use a lot.
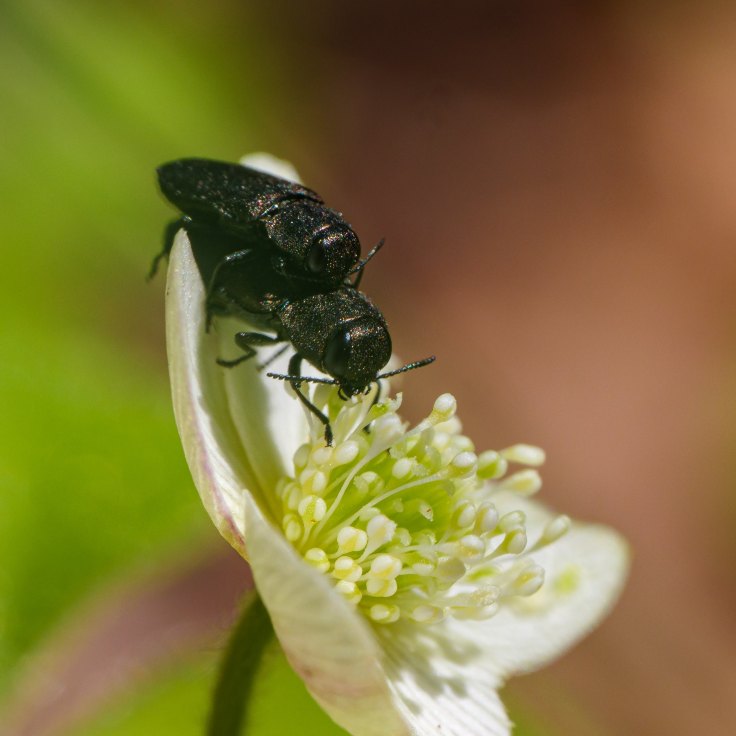
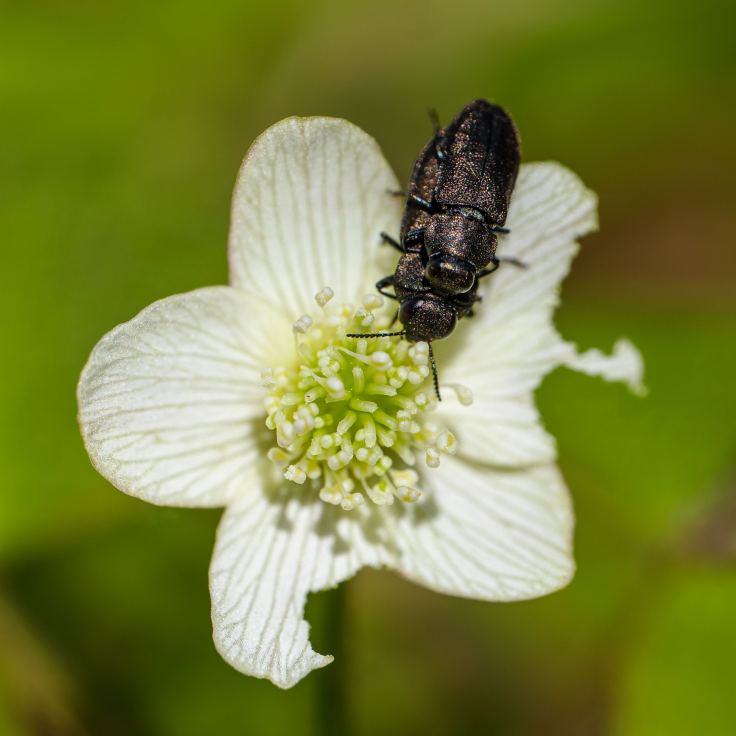
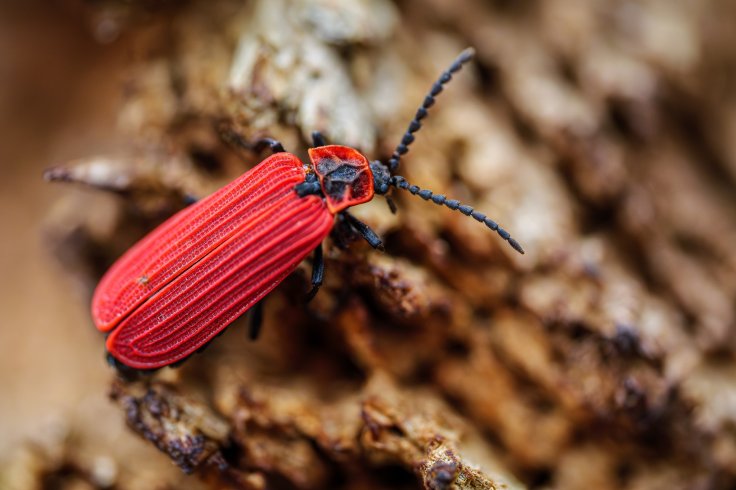
It will take some getting used to with the extremely narrow DOF, not only with single images, but with stacking as well. Because it throws the background out of focus so much more, the lens can be stopped down without making too much of a distracting mess. This might help me keep the number of images down when doing bracketing for stacking. The last beetle up there was only 15 shots at f/14 using 3 or 4 step distance in the bracketing parameters. I didn’t need to open wide to blur the background that much and it wasn’t far from the foundation of the house. I’ll do some comparison shots with it on the tripod eventually.
In Lightroom it shows the lens in the metadata and setting information, but like many Panasonic lenses, it is not in the lens profile list at all and so you have to manually correct for chromatic aberration and such if needed. Clicking Engage profile corrections and Remove CA check boxes engages the correction information embedded in the RAW files themselves, something that seems to be a M4/3 standard.
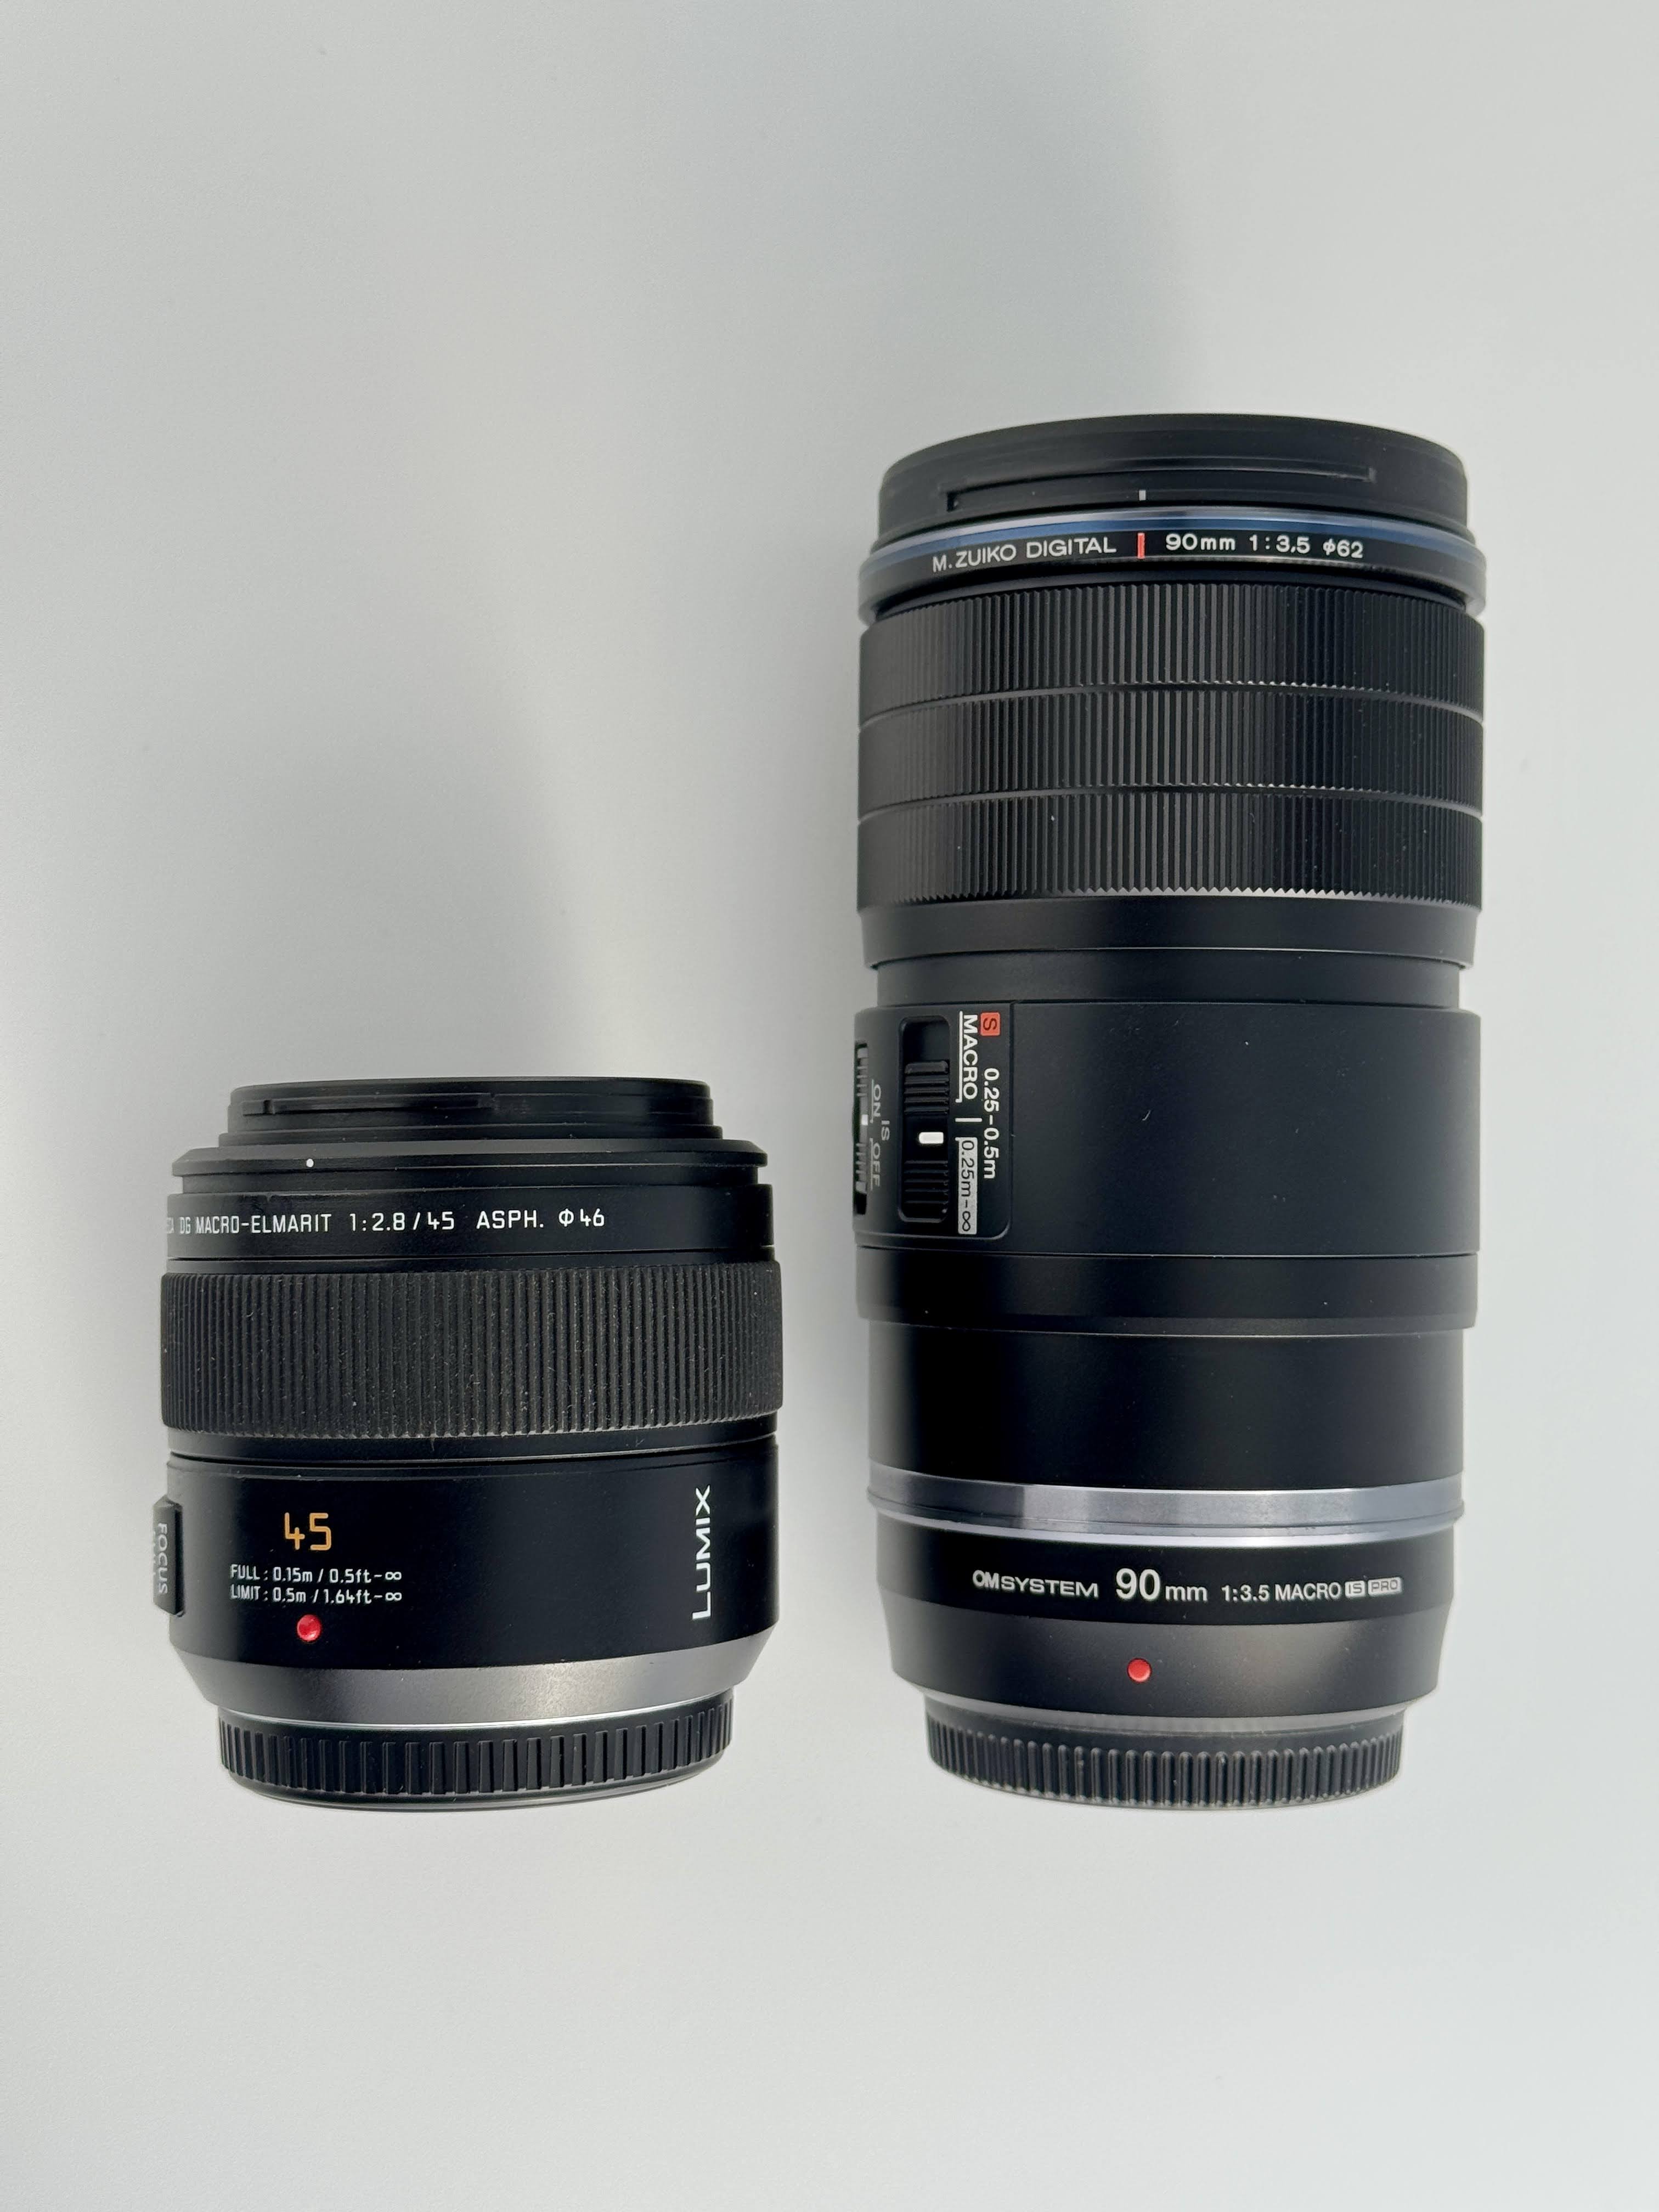
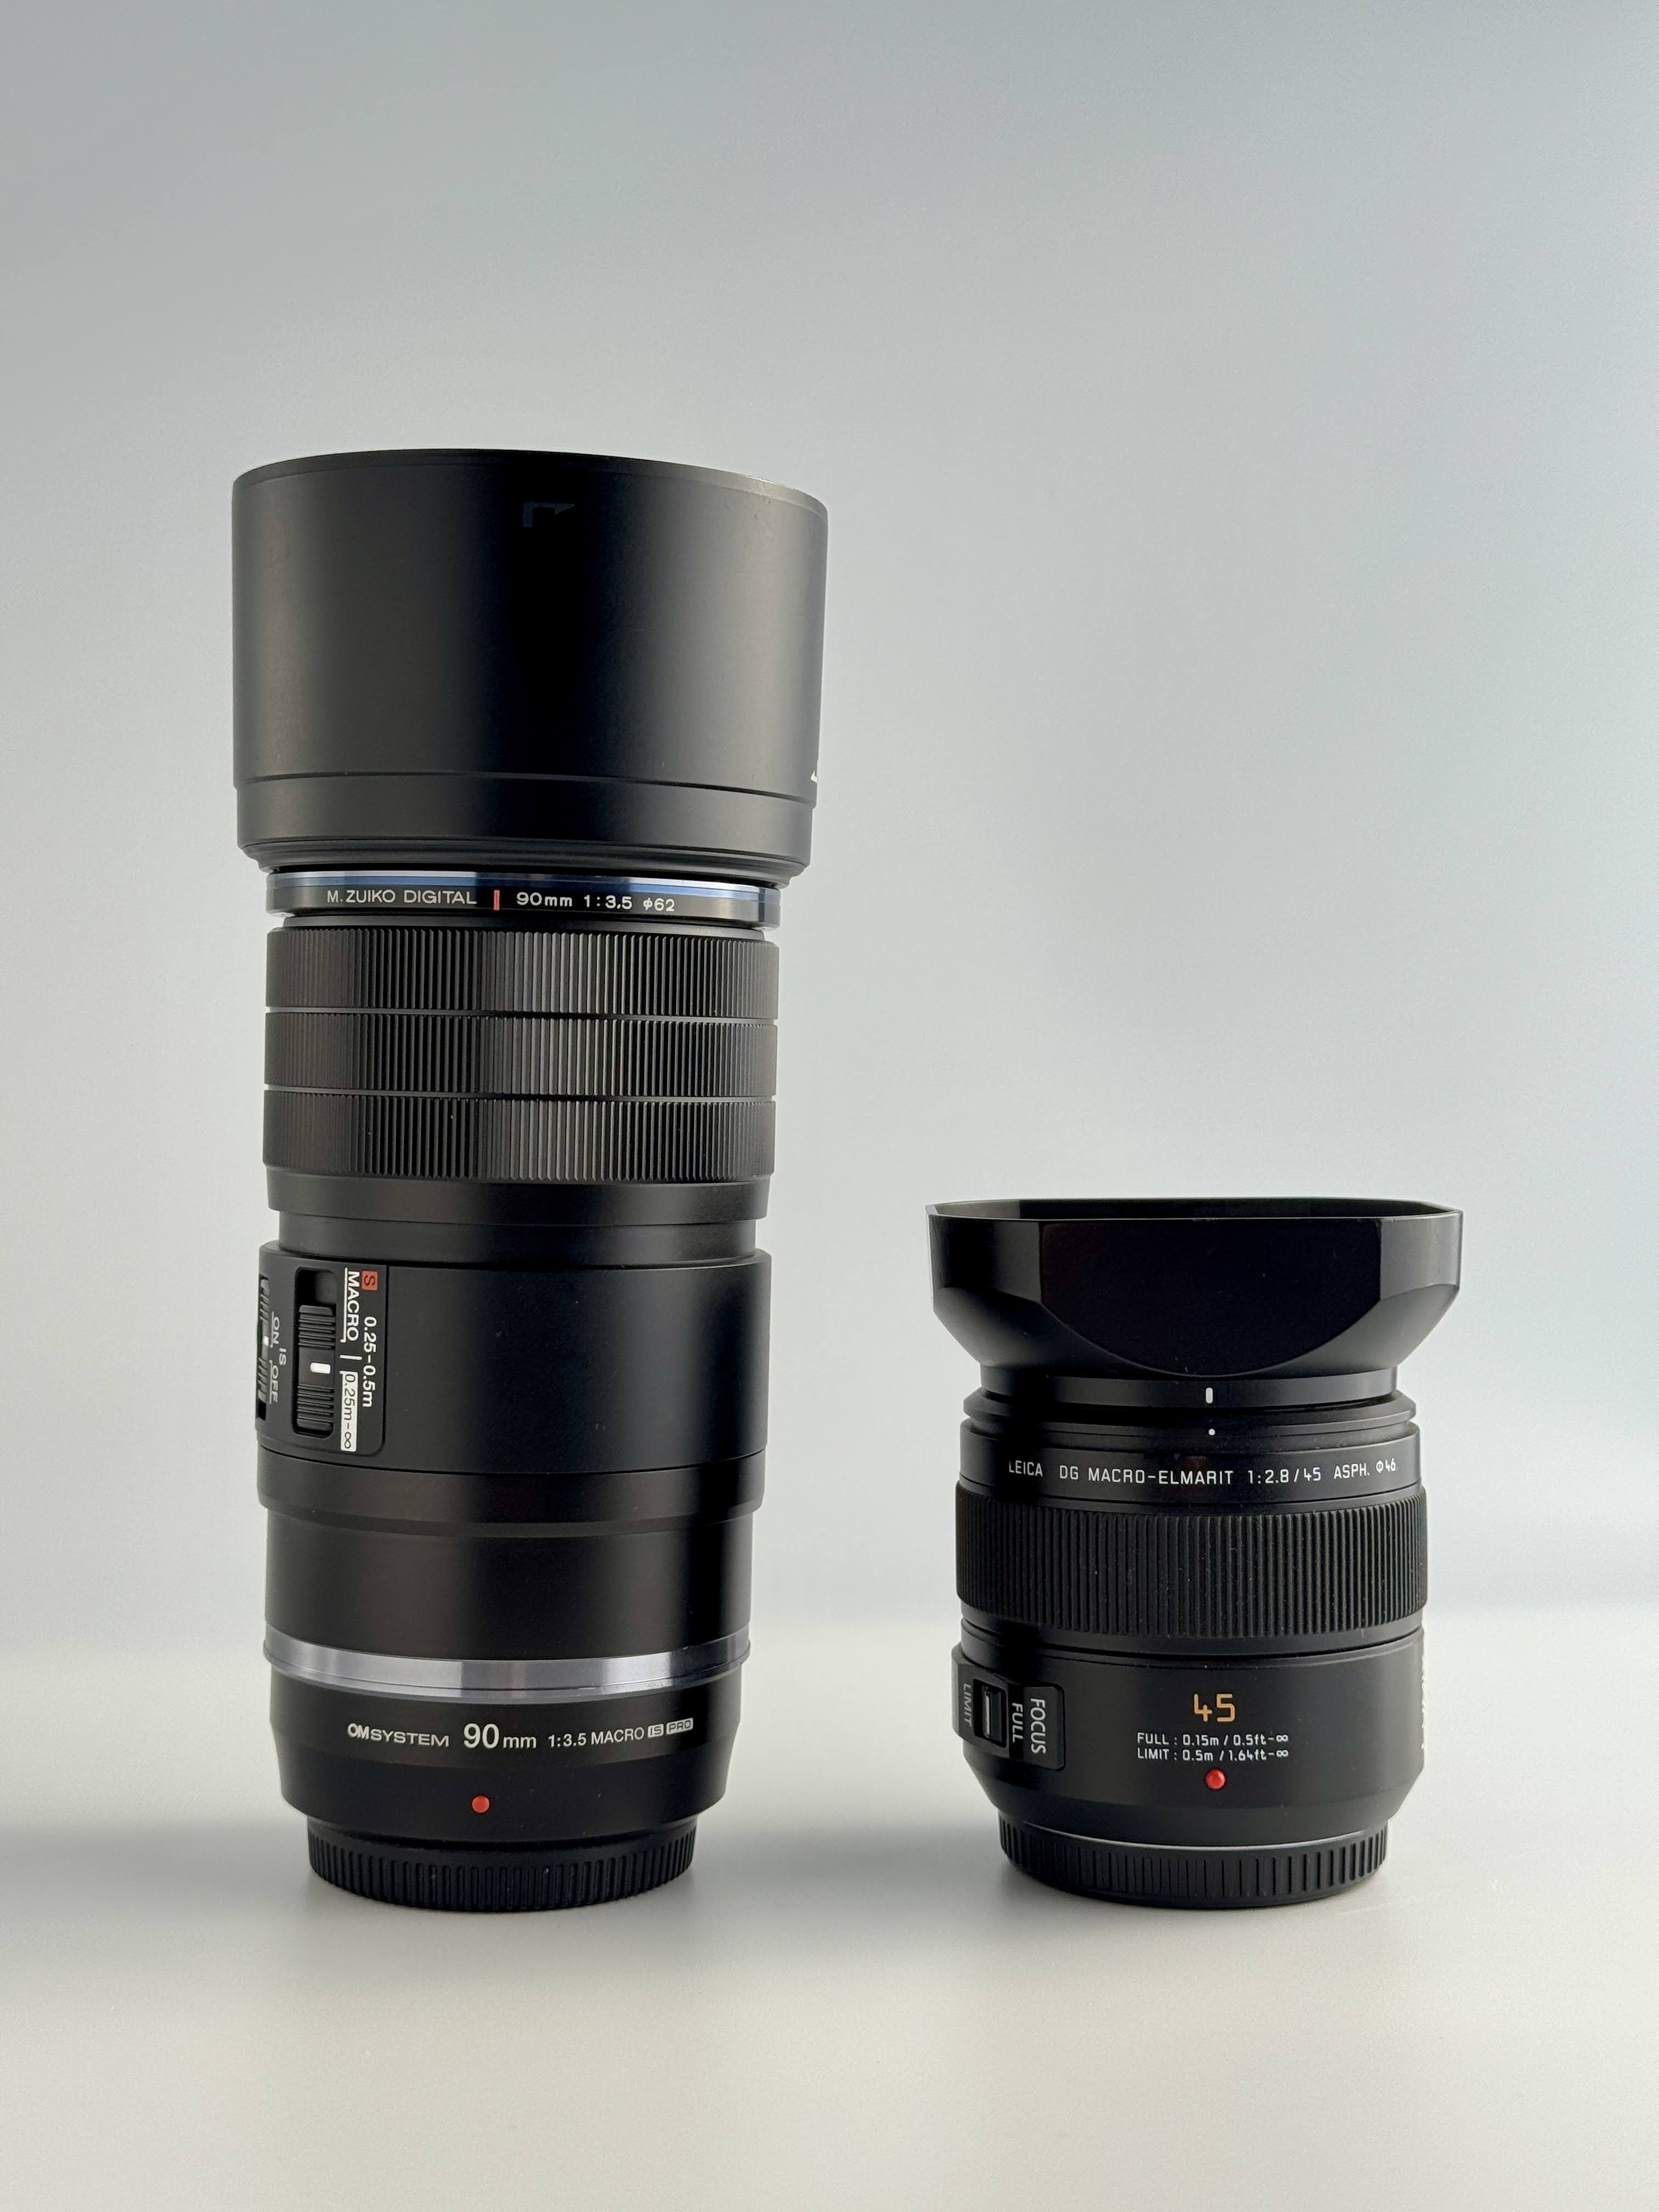
Here are a couple of pictures showing the size difference between the two lenses, with and without their hoods. Double the focal length = double the physical length which makes sense.
The differing perspectives will give me some options for presenting subjects in different ways, which I’m excited to try. Along the banks of my favorite bit of the Prairie river wildflowers are everywhere in spring and then mushrooms fruit in the late summer and fall, so plenty of subjects without having to walk too far. There is also a similar situation on a part of the Ice Age Trail that I really like. So I’ll be out and about with it soon. For now it’s cold and basically monsoon season as the winds are 10-15 mph every day. Not exactly ideal conditions for macro. Come on universe, give me a break already!
Here is a shot of a species of Click beetle that I found on my first day with this lens. The stack isn’t perfect, but the detail is amazing –

So that shot is cropped pretty substantially, but this one isn’t cropped at all and it’s a single frame at f/13 –

The lens was closer, but still a couple of inches away and because the beetle wasn’t skittish, I could get within range to use the 2X magnification feature. Pretty impressive. I like that the way to get to that setting is a switch on the lens and the focus clutch makes going from auto to manual focus really easy, and you don’t have to throw the switch on the camera itself. Focus peaking works as always and I can also fine tune with the focus ring while in S-AF mode on the G9 M2. Sweet.
I really wish OM Systems and Lumix would pull their collective heads out of their asses about image stabilization and lens functionality across brands. You guys are already at a HUGE disadvantage with this lens mount and you make things even more difficult for customers by limiting stuff to only one brand or the other. Grrr. Why can’t I use the custom function button on the lens with the G9? Why only OIS instead of Dual IS? What started as a more collaborative partnership among manufacturers with 4/3 and M4/3 has splintered into little factions. Really irritating.
Here are some more photos from the yard –
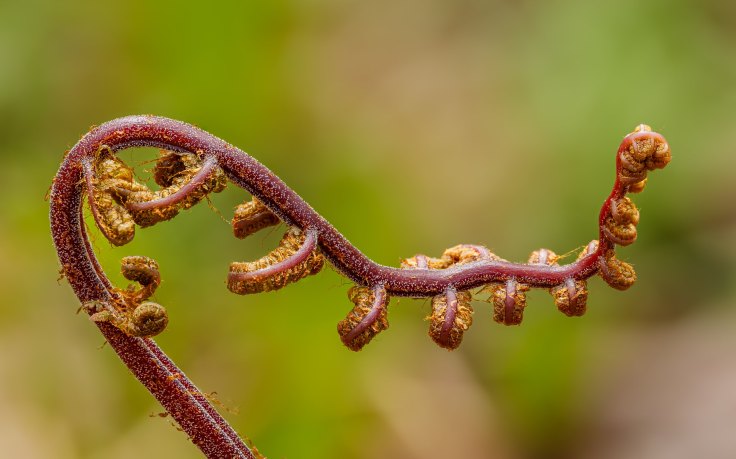
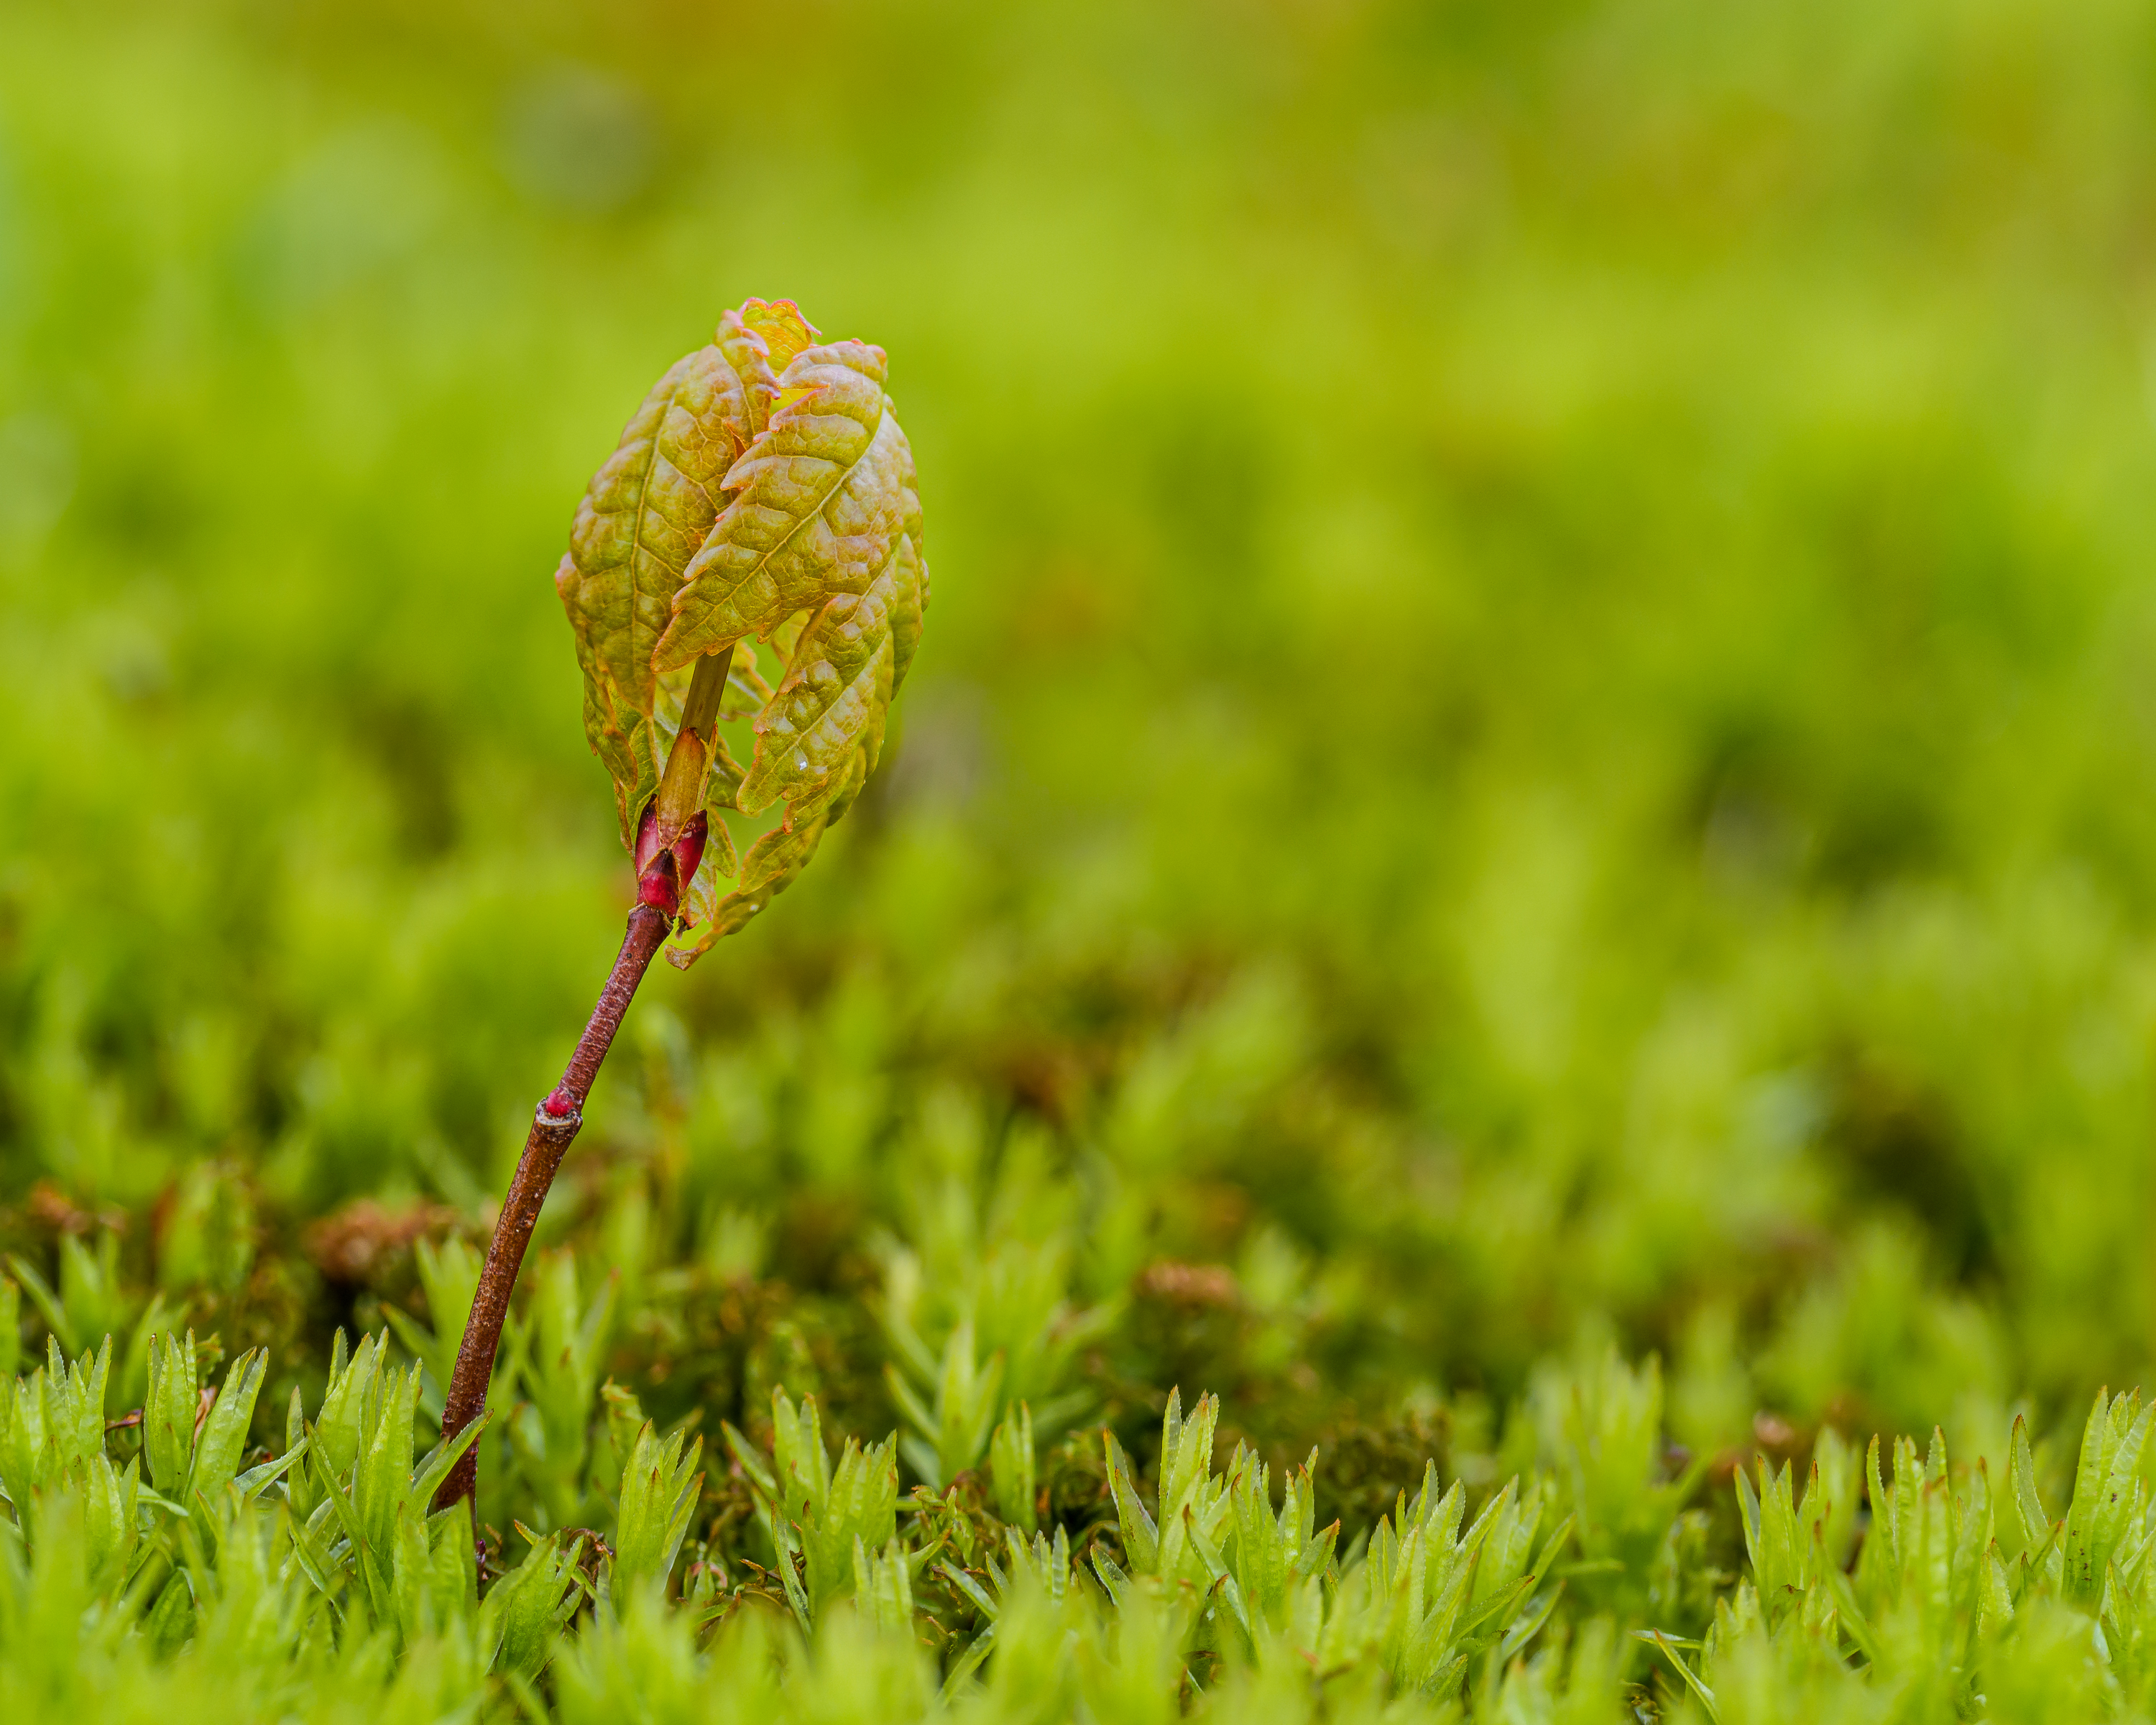
An 18-shot stack of this vibrant fern frond unfurling. 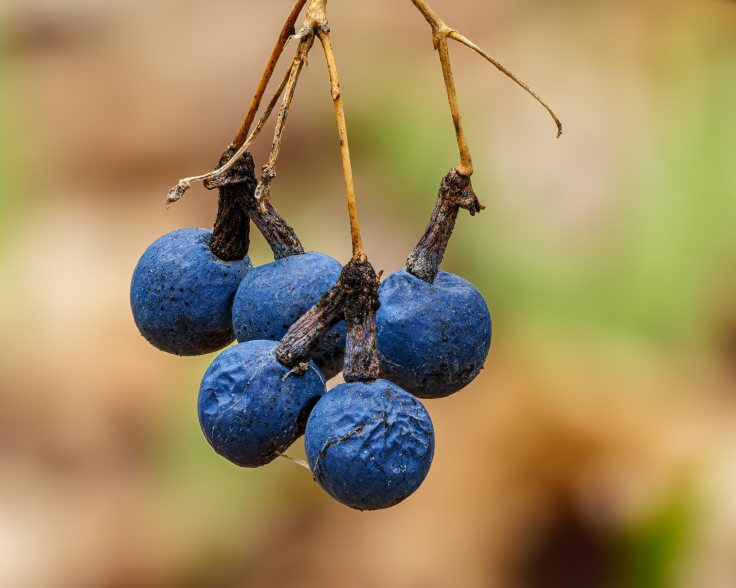
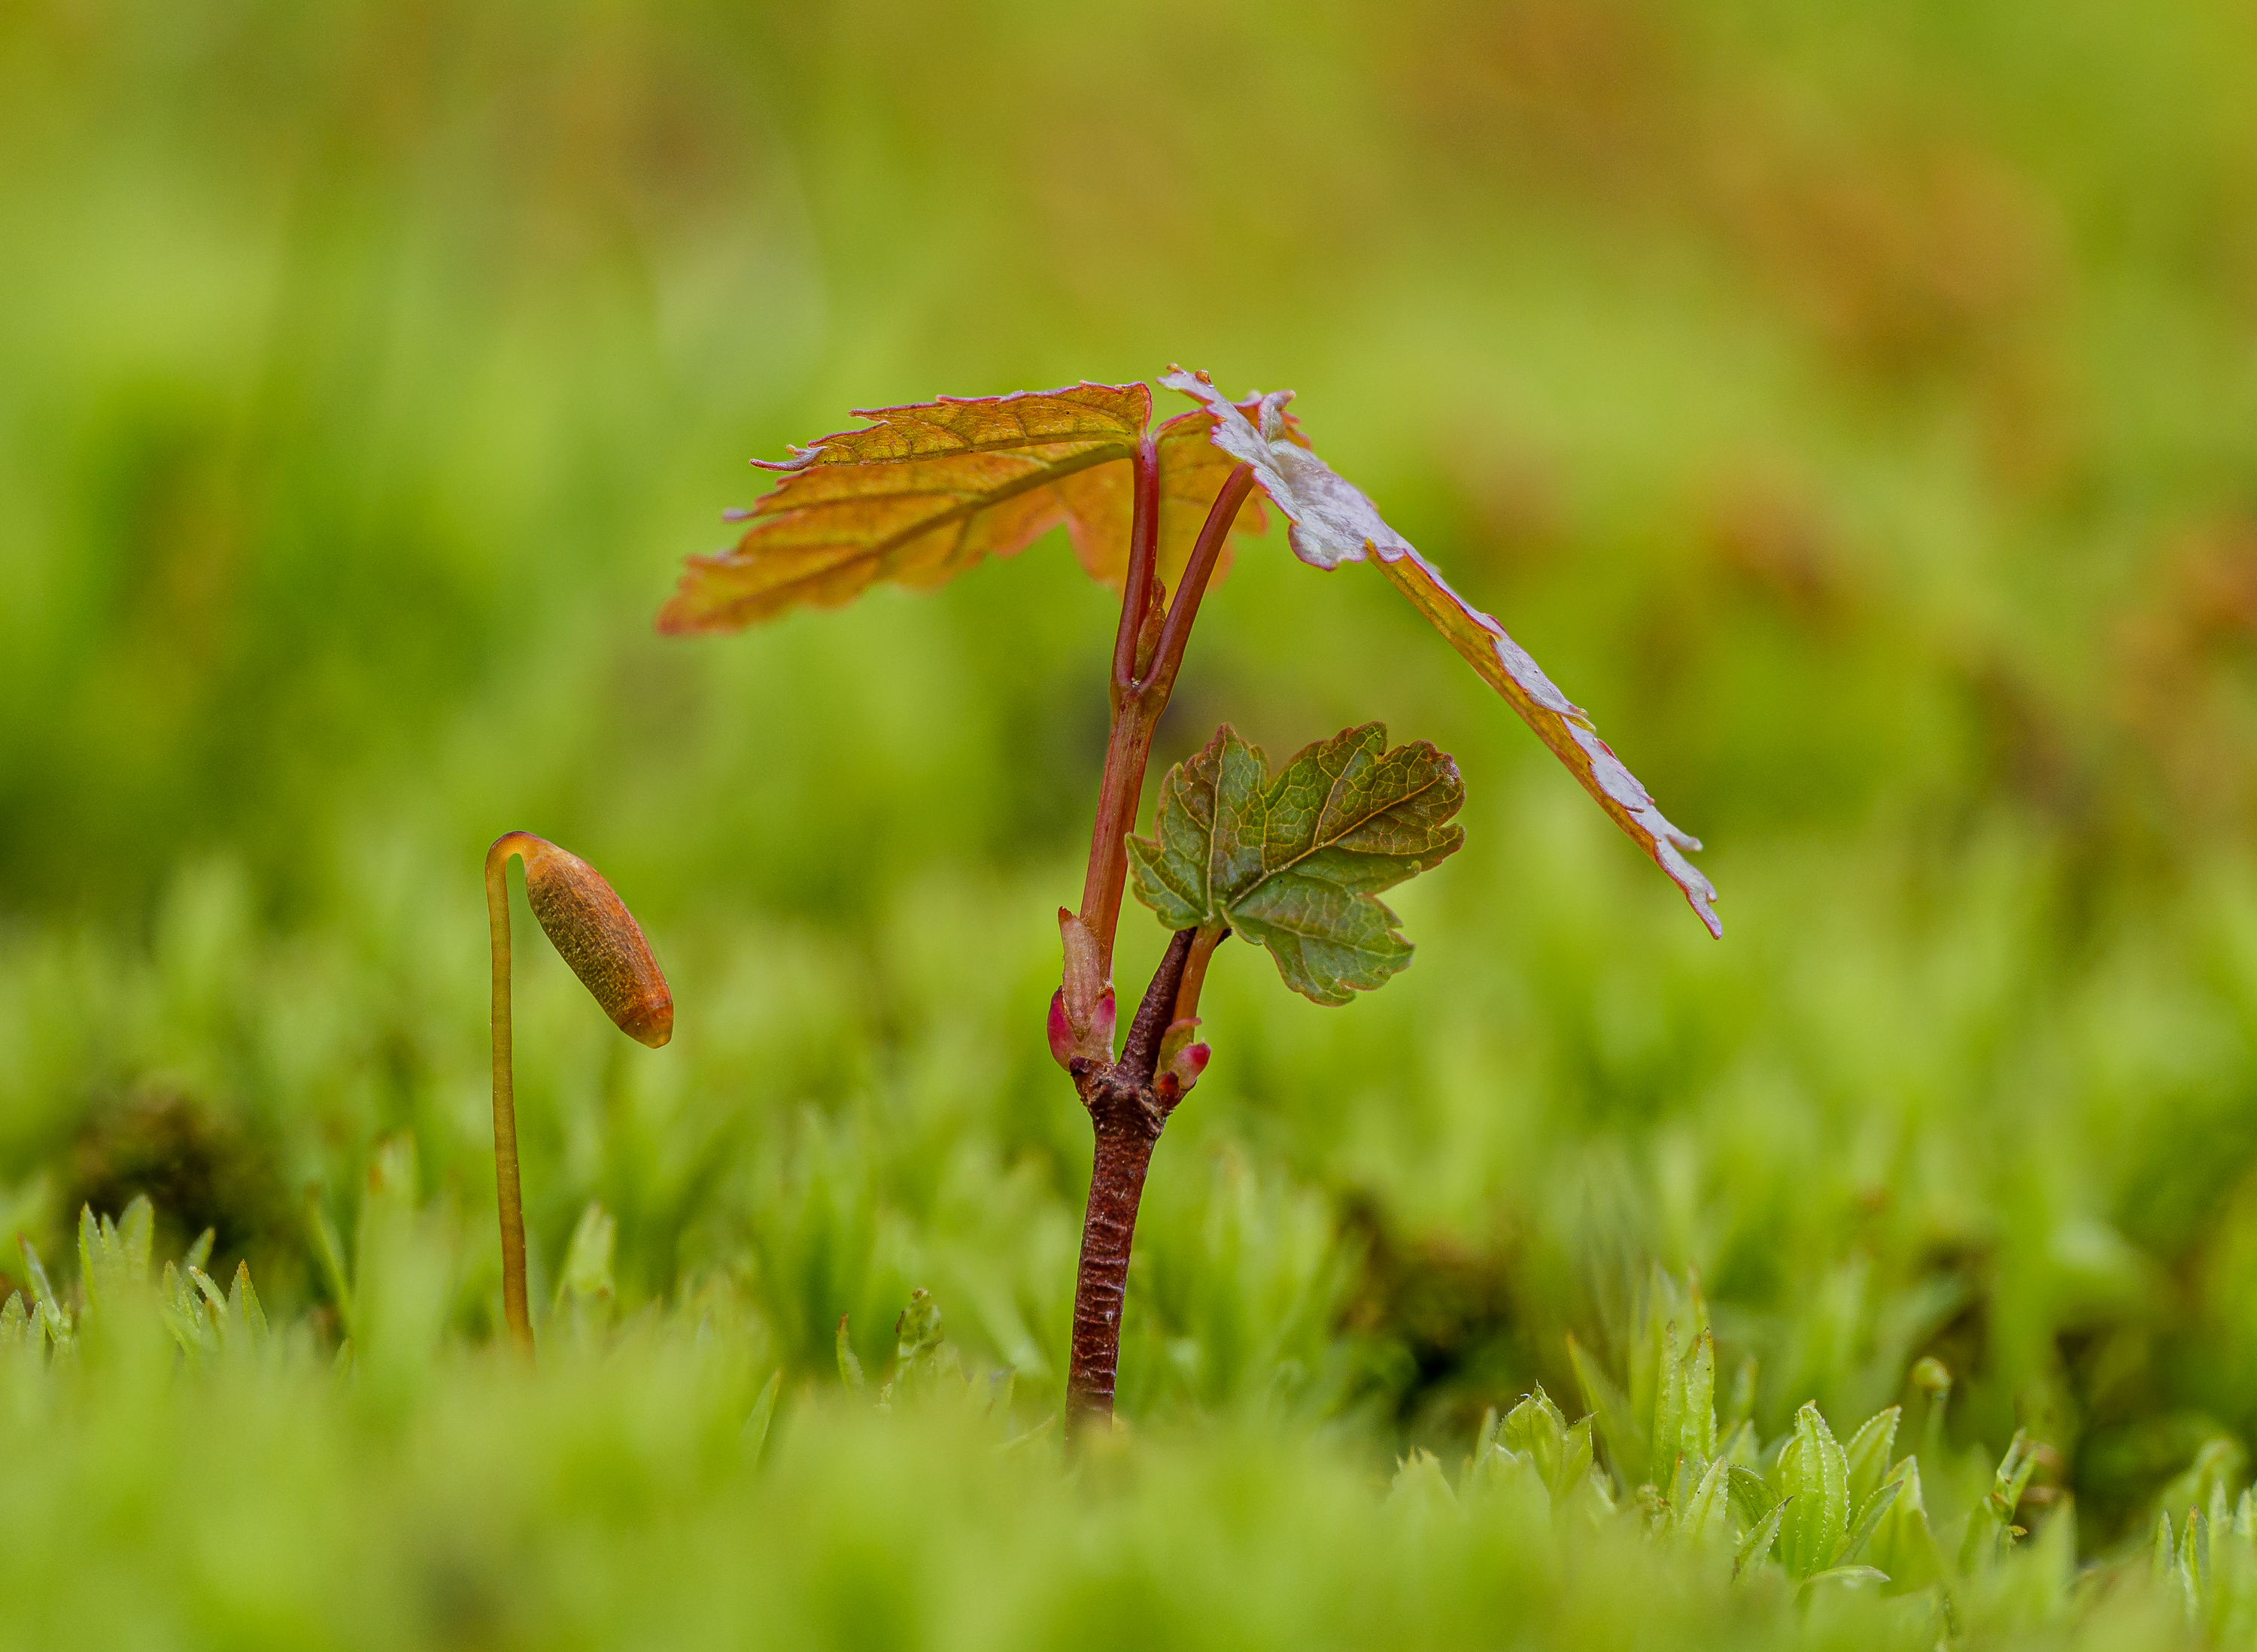
A 35-image stack of Blue Cohosh berries. 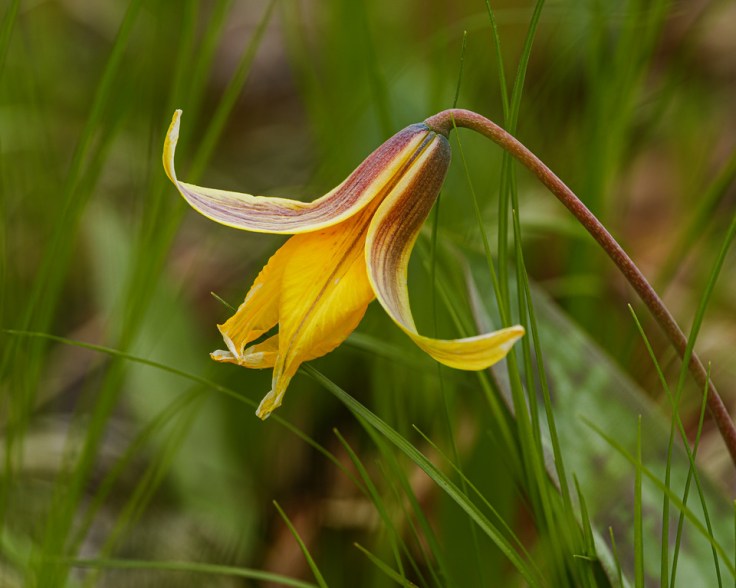
Single shot of a Trout Lily at f/7.1 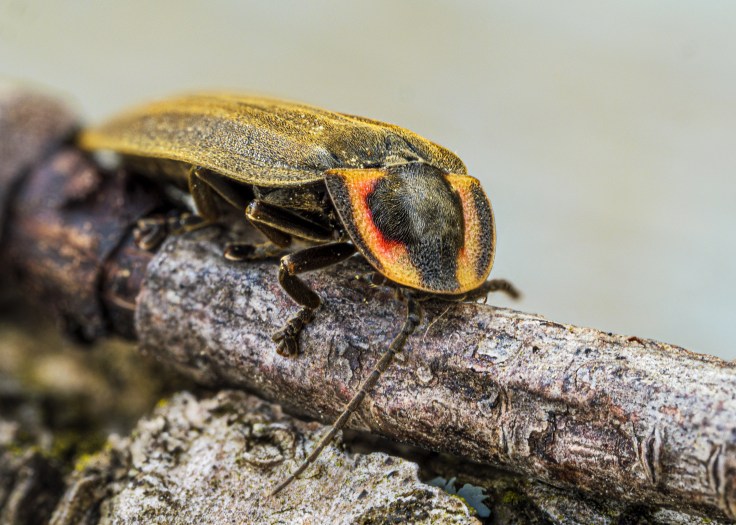
A 16-image stack at f/14 of the same Black Firefly, although at this magnification it doesn’t look very black. Was a docile little thing. 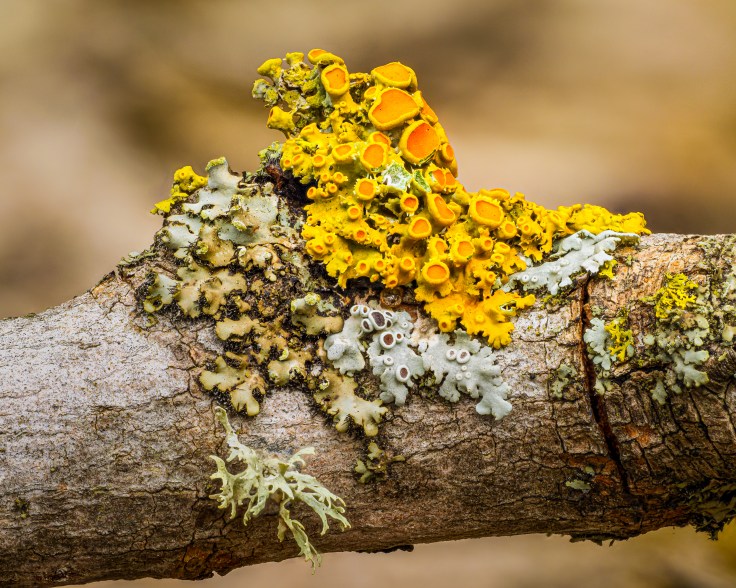
A nice deep stack looking at this cute little lichen cluster.
If I leave it attached to the camera, it goes in the Shimoda backpack along with the 12-35mm, the 35-100mm and I can either take the flash or the 100-400mm in the last section. In order for everything to fit with all that gear, the 90mm has to be on the camera as it’s too tall to stand upright like the other lenses. The 45mm can fit either in the main compartment or in the top depending on how much stuff I need. It isn’t “ideal”, but it’s workable. I can also put the flash in the top part if needed and bring the long telephoto, too. Phew!
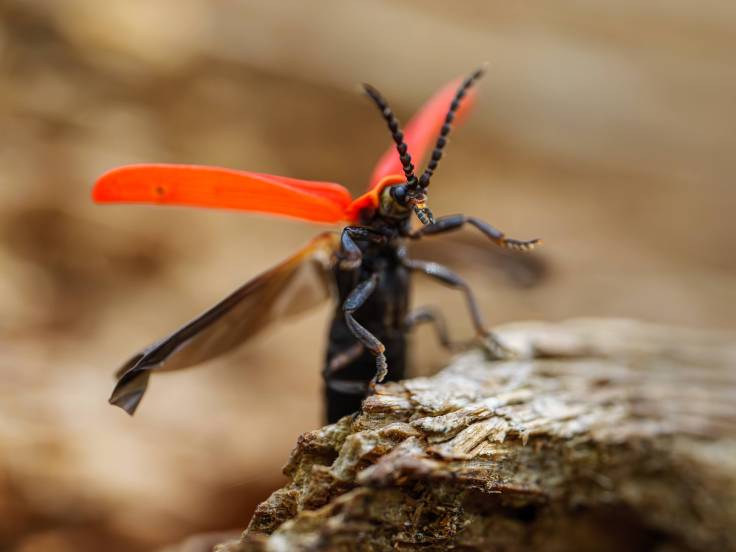
Because I haven’t posted in a while and I want to get this one out on Sunday, I will continue with another post investigating more features and uses like those extension tubes I mentioned above. I also need to try stacking with flash, something I can do with either lens, but haven’t tried. I shot a very short video clip of the red beetle (Golden Net-winged beetle aka Dictyoptera aurora), just to make sure it worked, but I haven’t done any serious video yet. I don’t have any reservations about that though.
My macro arsenal grows yet again!
Update!
The Lens Function button works! I was a dope because when I pressed it, I couldn’t see any effect on the screen so assumed that it wasn’t working. Wrong. It was, just with something I didn’t know it was doing. Also none of my other lenses have a function button so I had no reason to go into the menu items shown here –


Woo hoo! I now have it on Depth of Field preview (you can see the selection in the menu title photo on the left), making this new 90mm even more like the vintage one which also had a DOF preview button. All Olympus lenses did back in the day, one of the factors in my choosing that system over the others.

Leave a comment